This was a more “leisurely” trip, compared to most of my previous. We decided to spend 10 days in Italy in early October, and split that time between two locations so as to minimize packing/unpacking and traveling. We spent 4 nights in Rome and 5 nights in Amalfi (Amalfi Coast). This was definitely a more relaxing option…though we did feel like we had a little too much time on the Amalfi Coast and would have been better off doing 3 nights in Rome, 3 nights in Amalfi and 3-4 nights elsewhere!
HOTELS: Staying between two cities made hotels easy. We also had the advantage of leaving our belongings in the room as we took various day trips.
- Westin Excelsior – Great old world vibe. We loved our room – which had an antique feel to it and two balconies. Being a Platinum member with Marriott, we opted for the free breakfast each morning – which was well worth it! They had a full
 continental spread, an omelet bar, custom juice bar, etc. The location was right off of the Borghese Park, which was elegant and convenient. It was also a bit quieter compared to staying within the heart of Rome. It was easy walking distance for all the touristy sites. The King size bed was plush and lovely (and rare for Italy!). The hotel had a nice gym/spa, for those that partake while on vacation!
 - La Bussola Hotel Amalfi – Awesome location! Right off the water and a quick 3 min walk from the main ferry docks and downtown Amalfi. The hotel had a minimal
 continental breakfast but it was enough to get us going in the morning. There was also a rooftop with great
  views of the waterfront. The bed was fairly uncomfortable and the air conditioning wasn’t ideal, but we did have a nice balcony overlooking the water/coast. Overall, a good option for the cost. We
  booked on hotels.com and received a free bottle of wine with our room!
Even though we didn’t stay there, we did visit the NH Collection Grand Hotel and wished we had spent the extra cash to stay there – lavish grounds with many lemon tree zen spaces to read on a lounge chair or hammock, sit by the pool, work out in the outdoor or indoor gym, etc. This picture of their honeymoon table summarizes the gorgeous details of this hotel.
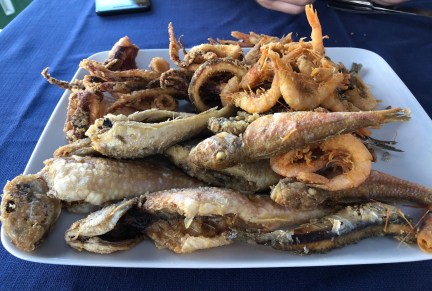
RESTAURANTS: In Rome, we just wandered around and found unbelievable wine, food and gelato everywhere! You really cannot go wrong with fresh pasta and pizza every place you look. Amalfi was similar, with excellent seafood blended in. The two restaurants below stood out in Amalfi.
- Pizzeria Donna Stella (Amalfi) – great, affordable pizzas under the quintessential lemon trees. Casual dining. A definite favorite.
- Ristorante Pizzeria Teatro (Amalfi) – the food and ambiance were fantastic! The service was a little slow (had to ask for the bill 6 times), but we loved feeling like we were in a locals spot and a bit off the main drag.
ACTIVITIES/SIDE TRIPS: A few of our adventures in both regions…
- Rome:
- Vatican (Sistine Chapel) – we used the tour company “Headout” and booked a one day comprehensive tour that covered both the Vatican in the morning and Colosseum in the afternoon. We assumed that by getting on the early Vatican tour (and paying for the cut-the-lines feature) that it would be less crowded. NOT the case. This was my least favorite experience of the entire trip. There were people everywhere and tour groups blocking every nook in the museums and finally, in the Sistine Chapel. Tourists took photos in the Chapel, despite the many reminders that this was not allowed. Therefore, the guards
 were constantly yelling and disrupting the silence that should come with the experience. Our tour guide was difficult to understand and the audio devices they gave us were terrible quality. I would not recommend this Vatican tour or going when there is still any remote semblance of tourism season.
 - Colosseum – same tour company but this experience was much better. Our guide spoke clear English and there seemed to be a lot more room to spread
 out and enjoy the sites. The inside of the Colosseum was staggeringly cool. I could definitely visit this again and again.
 - Trevi Fountain, Pantheon, Roman Forum, Spanish Steps, etc – all worth walking to and taking in the rich heritage. There were still a lot of tourists, but at least these are free attractions and the people come and go. The Pantheon is my favorite – the architecture and art within draws me in for hours. It also reminded me of the “moon door” from Game of Thrones. 🙂
- Cooking class – highly recommended! There are a few options, but book in advance. This was such a neat and authentic experience to have while in Rome.
- Vatican (Sistine Chapel) – we used the tour company “Headout” and booked a one day comprehensive tour that covered both the Vatican in the morning and Colosseum in the afternoon. We assumed that by getting on the early Vatican tour (and paying for the cut-the-lines feature) that it would be less crowded. NOT the case. This was my least favorite experience of the entire trip. There were people everywhere and tour groups blocking every nook in the museums and finally, in the Sistine Chapel. Tourists took photos in the Chapel, despite the many reminders that this was not allowed. Therefore, the guards
- Amalfi Coast:
- Salerno – we took the train from Rome to Salerno, which was an easy affair. I recommend booking early to take advantage of discounted fares. The train station in Rome and Salerno were easy to find and navigate. Just watch out for unsolicited help in “finding your train”. Only trust those in uniform. Once we
 arrived in Salerno, we had about 2 hours to kill before our ferry to Amalfi. We ate at Miglio Zero, a small seafood restaurant on the dock that serves fresh catch. It was fantastic! The TravelMar ferry (which you could book ahead or right at the dock) was right on time and only took about 25 min to get to our dock in Amalfi.
 - Amalfi – this is the town we decided to stay in throughout our trip. It was centrally located and had easy ferry and bus access to all the other towns on
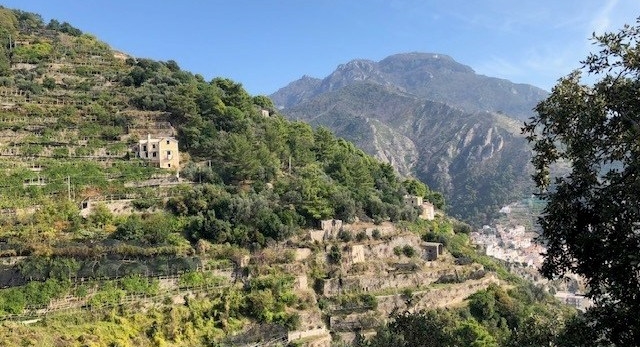
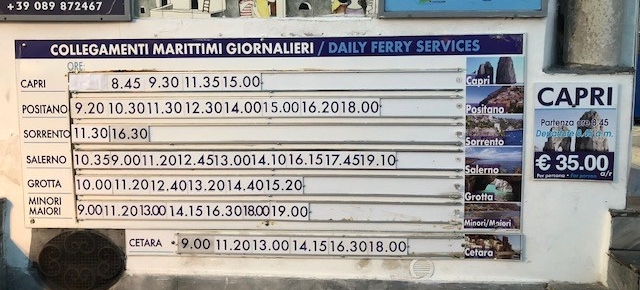 the coast. The ferries can be booked right there on the dock, but in peak tourist season, it was recommended to book in advance. There is a quaint but vibrant downtown area and a beautiful marina ocean front. There is a famous papermill to visit and the mountain cemetery is pretty neat too. It’s a nice place to get lost amidst the winding mountain streets/walkways.
 - Positano – very crowded and posh! It is, of course, beautiful and the beach is the nicest of the towns we saw. The shopping and restaurants were crowded
 but it was worth spending half a day exploring. We hiked there from Agerola, which took about 3 hours.
 - Minori/Maiori – small town, local feel. Definitely not as high trafficked as the other towns, which we liked. We had breakfast there and began our short hike, known as the “Path of Lemons“. This was one of the shorter but more memorable hikes.
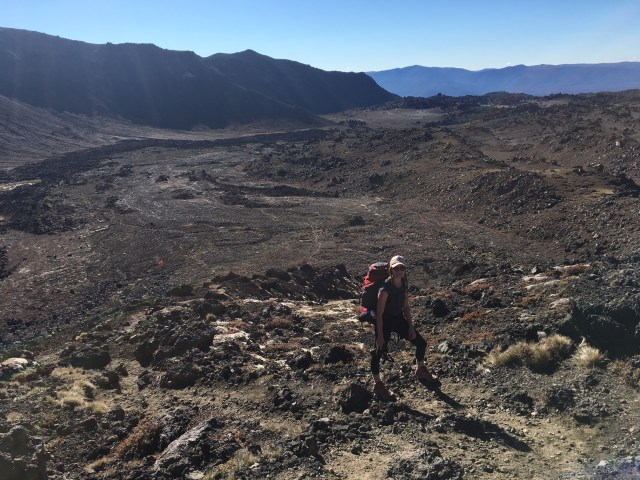
- Hikes – there are lots of local walks/hikes through the lemon groves between towns. We tried to do a hike a day. Highly recommend this! There are adorable shops and restaurants to stop at along the way, and many photo moments. It can be tough on the knees (lots of downhill stairs) but a nice way to explore the area. We did all of the hikes without a tour guide or company. It really isn’t needed! The hikes are pretty well marked and there are usually quite a few tourists going on the same itinerary that you will meet on the buses, etc. The drivers all know too! When getting local bus tickets, you can buy them the day of but get to the bus early. Seats are a premium and you don’t want to be standing as the buses maneuver those tight hair pin turns!
- Path of the Gods: our favorite of the trip. Stunning views and great exercise. We took the local Amalfi bus from Amalfi to Agerola (ask the bus driver to drop you at the Bomerano stop).
- Lemon Walk: “Path of Lemons”

- Amalfi – Ravello: LOTS of steps, as it typical in these Amalfi hikes. We actually did this hike in reverse – we took the local Amalfi bus (tickets bought the morning of) to Minori and began our hike from there. Amalfi to Ravello AND Ravello to Minori
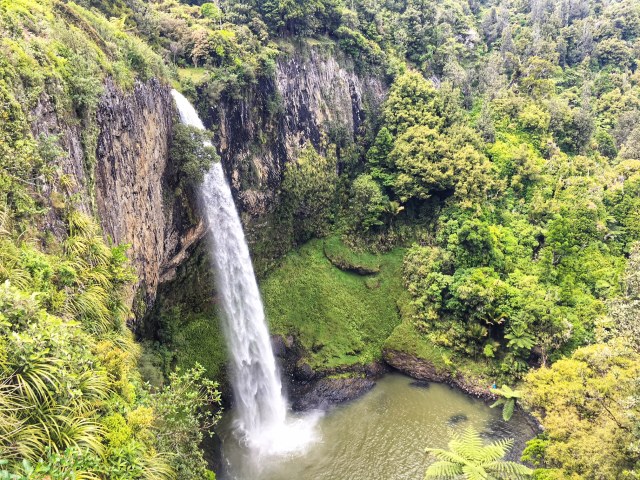
- Vallone delle Ferriere: immediately behind Amalfi (walkable from the center of town/waterfront). This was a nice forested hike that is in and back (no loop). There are cool old ruins and waterfalls along the way. It does dead end in a park that you need an advance permit for, but we didn’t feel like we were missing out not having one/going in. The hike to that point was great enough! Hike link
- Monte Solaro (Capri) – see below.
- Capri – our favorite of all the towns in the Amalfi coast! The island is insanely crowded on the waterfront (and very touristy) but once you get away from that, the island opens up nicely. I imagine that staying the night would be lovely, as all the ferried tourists are gone by 5pm. We arrived via ferry for a day trip and opted to pack our day with a nice hike and some exploring. We felt overwhelmed by
 the crowds at the water, so we bought ourselves some local bus tickets (cheap) and waited in line for 25 minutes to catch the bus up to Anacapri. We loved this little town! Lots of shops and restaurants, and a decent gym (if you like to work out while on vacation in Italy, ha). From here, we found our way to the trailhead and did the hike up to Monte Solaro. This was a great, non-crowded hike with spectacular views at the top. We ended up taking the chair lift down to preserve our knees and take in the views. Taking the bus back down to Capri was no picnic – we waited in line for about an hour and a half for a non-full bus (it was 2pm on a weekday). The attendant kept saying the bus was a few minutes away…it was not. May be worth the extra cost of a private shuttle or the convertible taxis! Capri is a definite must go back on the list!
- Salerno – we took the train from Rome to Salerno, which was an easy affair. I recommend booking early to take advantage of discounted fares. The train station in Rome and Salerno were easy to find and navigate. Just watch out for unsolicited help in “finding your train”. Only trust those in uniform. Once we
")
")
")


 It felt like we had the whole place to ourselves. Super peaceful and a great place to meditate and reflect. The landscaping is something to be admired as well!


 From there, we hopped on the bus to Gora (where the loop begins).
 We found it a great time to chill out, instead of fighting the crowds of tourists with cameras. 🙂 The Fall foliage is simply gorgeous.
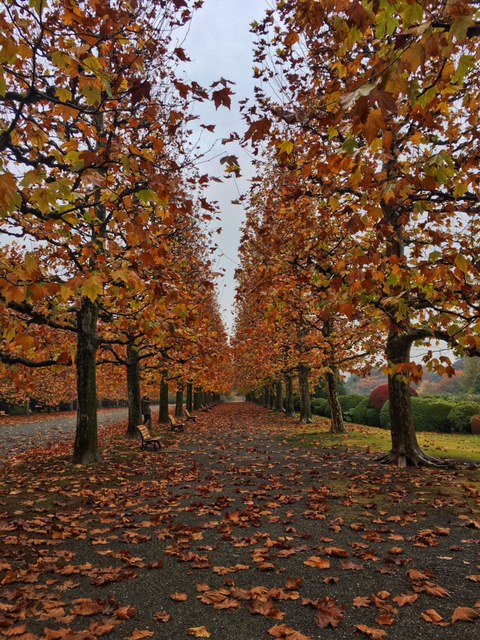
 You order at a vending machine (cash) and take the ticket into a little bar area. You leave the ticket on a dish and they bring you your order. Each seat at the bar is closed off to the others, so you can eat semi-privately, if desired. We saw many solo Japanese business people come in for lunch. Theoretically, you could go there and never have to speak to anyone the whole time…wait staff included!


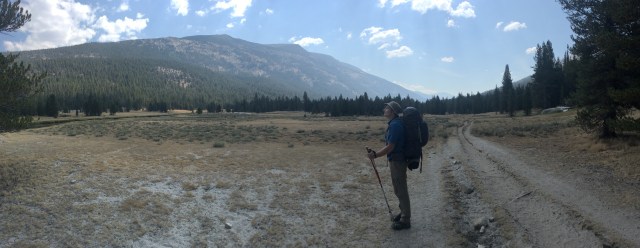
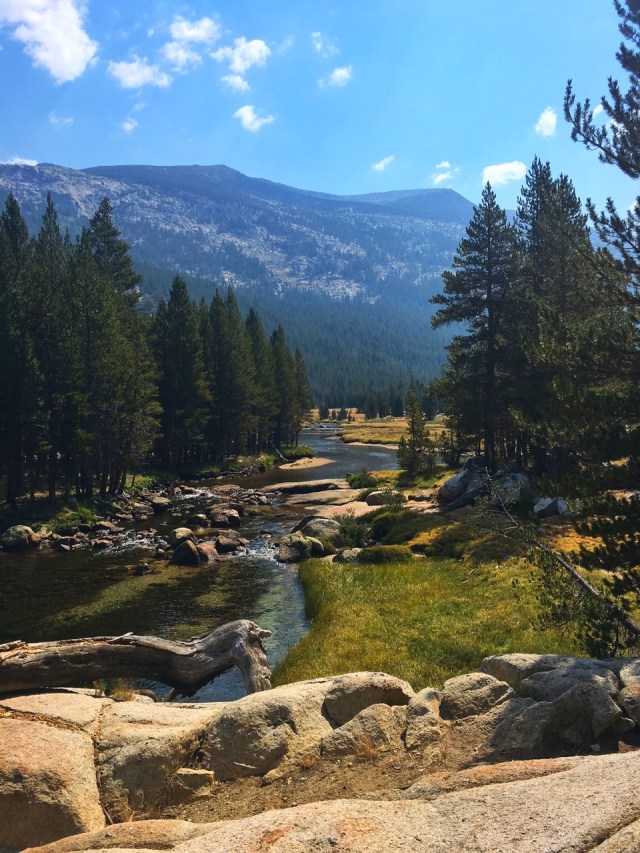
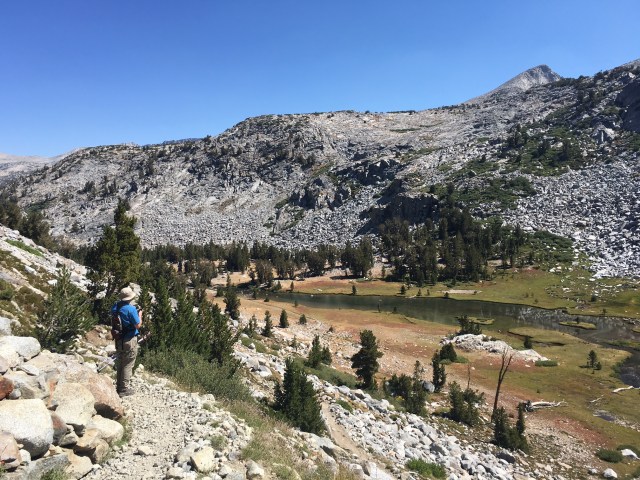
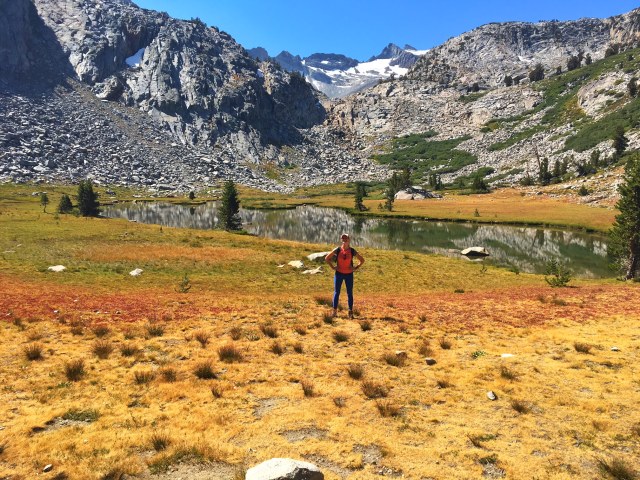
 campsite! We woke with the sun and made our way to Cathedral Lakes (our second camp site). The meadows outside Tuolumne are stunning. They seem to go on endlessly. We passed Sunrise High Sierra Camp, where we stopped for lunch. We got to Cathedral Lakes fairly early, which gave us a pleasant break. We swam in the frigid water and set up camp. We enjoyed hot chocolate by the water’s edge and played cards. Perfect end to an excellent day.


 stop there forst for the experience. This turned out to be a brilliant choice as we were some of the first ones in (it gets crowded). Freezing air, and warm sulfur baths with mud masks. Absolute heaven and well worth the price tag.
 spent a day exploring town and had a brilliant time at a local (though touristy) English pub – http://www.enskibarinn.is/en/ . Lots of travelers during the week and locals on the weekends. The bar/club scene picks up tremendously over the weekend (it goes all night), when the locals come out. We also had trendy, wonderful (though expensive) dinners at the following:
 glaciers, lava fields, etc. When I make my return to Iceland, I am certainly going to plan for a full week of driving the Ring route, and staying at the various B&Bs along the way. Another day, we drove north to some of the coastal towns.
 a fields in the south. This adventure was an expected joy, as it was essentially void of people. It seemed that we had the whole world to ourselves, and the landscape looked what I imagine Mars to look like. Simply cool.
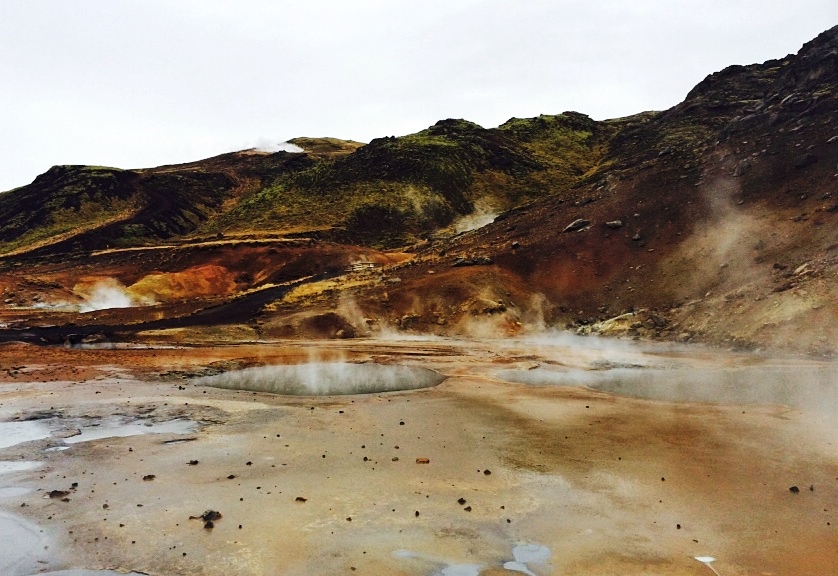
 buses and cars, but transportation is essentially dominated by tuk tuks, motorcycles and bikes. I am absolutely impressed by the amount of stuff that people are able to load onto their bicycles…crates, at least 4 dozen coconuts, furniture, live animals, multiple children. There seems to be few traffic laws, if any at all – the only rule I’ve noted is that everyone gives way to the bigger mode of transportation. Walkers to bikes, bikes to motos, motos to tuk tuks, tuk tuks to cars, and cars to shuttles. Despite the seemingly chaotic structure, it seems to work well and honks are merely used as a warning of passing by. I am also amazed by the age of some of the drivers…I swear, mothers have their three yr olds driving these things. Either way, I’m sold on the tuk tuks.
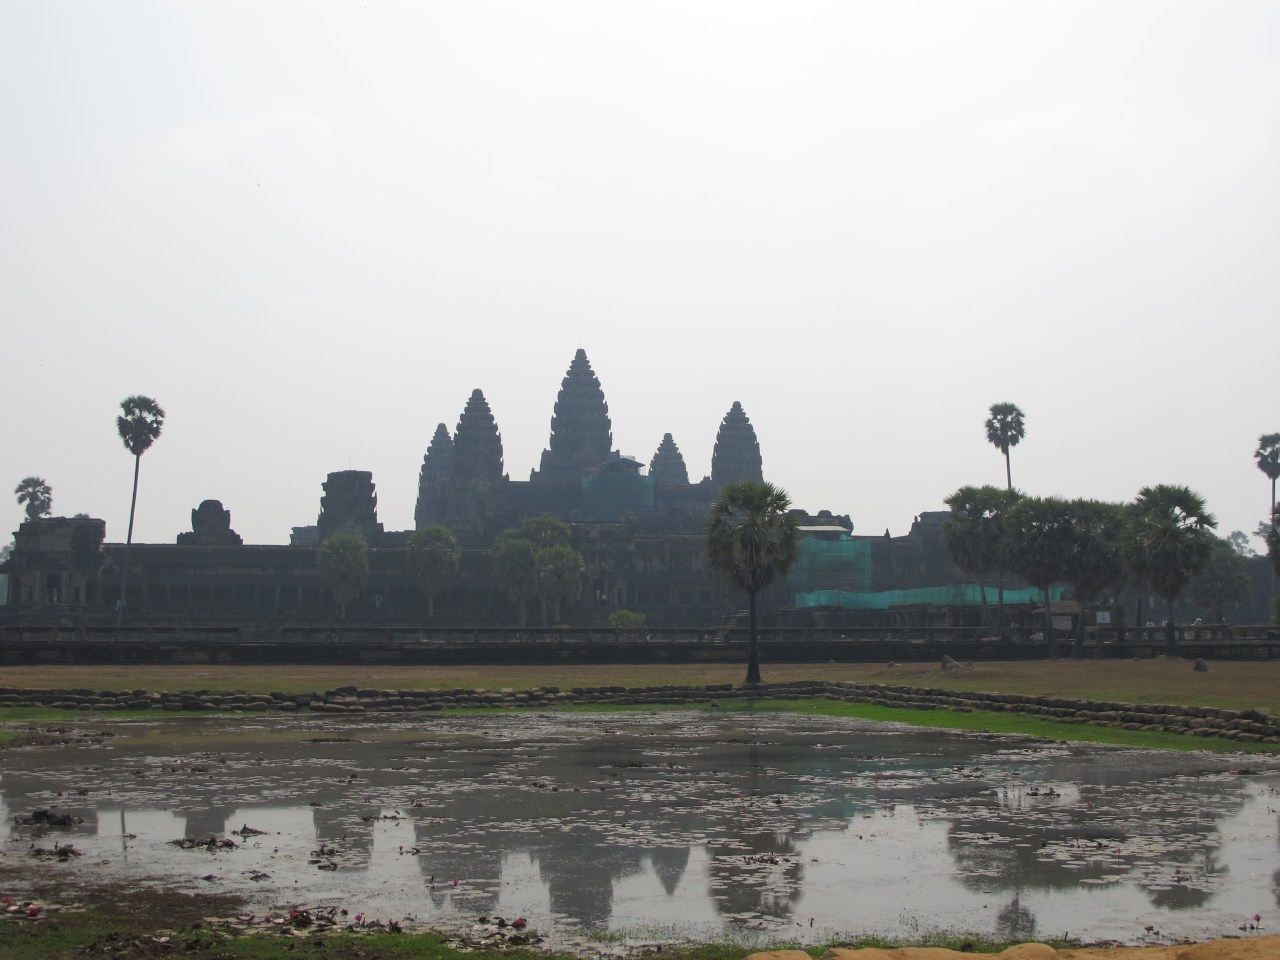
 es. The city of Angkor Wat has been around since the 12th century and at that time, boasted a population larger than London. The only disappointing part of the city is that it is operated (and therefore profited by) private companies. It would seem to me that the city/country’s biggest tourist destination and largest revenue producing venue would truly help the government to assist their people in emerging from the severe poverty that has evolved.
