New Zealand – North Island

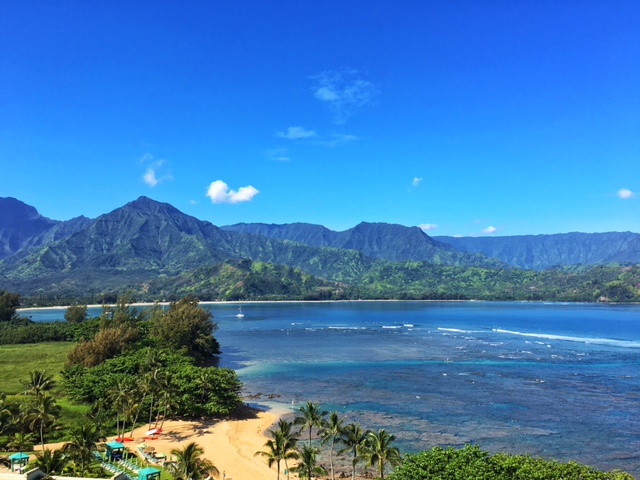
An endless array of outdoor activities and a laid back vibe. Our main mistake was only spending one week there and not being able to explore the south island as well! We went over the week of Thanksgiving, and lucked out with incredible weather. While the wine was excellent, we were not overly impressed with the food.  Tipping is not standard but if service was excellent, we were told that 5-10% was greatly appreciated.  Since we were planning to be both hikers and tourists, we packed one normal carry-on suitcase with our basic needs and then our camping backpacks with our hiking gear.  It was easy to check both bags and be able to leave the stuff we weren’t using in the trunk of our car. One other tip – don’t be fooled by the weather forecasts.  Despite the expected top temperatures being shown as around 70 degrees, when the sun comes out there…it is incredibly hot!  Pack light, breathable layers and lots of sunscreen. Below is our itinerary and a few of the trip highlights!

Type of Trip: Self Planned 

Day 1: AucklandArrive in Auckland, direct LAX-AKL on American Airlines.  We picked up our rental car at Hitch (fair priced and easy to pick up/return) and drove to our hotel.  Get ready for driving on the other side of the road!  We dropped our stuff at the B&B, where they greeted us with a complimentary glass of wine and coffee.  We spent the rest of the day exploring Auckland – stopping at the Wharf for lunch, visiting the bridge bungee jump (didn’t do it though), and popping in a random bar on our walk home.

Hotel: The Great Ponsonby Art Hotel – lovely accommodation with a fabulous breakfast in the morning! Totally recommend this spot.

Day 2: Raglan –  After a restful, jetlag catch-up sleep, we took our rental car and began the road trip down to Raglan.  Beware of tons of road construction with gravel roadways and large trucks.  Our first stop was the famed movie set “Hobbiton”, where the Lord of the Rings movies were shot (The Shire).  While pricey, this turned out to be really awesome!  Either make your reservation in advance (it gets slammed) or go first to the Matamata Visitor’s Center and book your tickets there at the same price.  We ended up doing that and the bus picked us up and dropped us back at the Visitor’s Center.  Before the tour, we stopped for lunch at Redoubt Bar & Eatery.  The waitstaff was friendly and accommodating and the food was the best choice that we found in the small town.

Hobbiton was seriously cool.  Such elaborate art design and the tours are spaced out well so you don’t feel overcrowded.  The tour takes you through the set and provides fun movie trivia along the way.  The tour ends with a complimentary drink at the Green Dragon (yes, the bar from the movie).

IMG_9300

The rolling hills of farmland along the way was gorgeous.  Lots of cows and sheep, which added to the ambiance.  When we finally arrived in Raglan, the vibe shifted to chilled out surf mode.  Our studio hotel room was perfect, and ideally located.  We had an extended dinner at Orca Restaurant…the service was dismal (they didn’t come to the table for 30 min and when we did order, they forgot about our order)…so that turned into a 3 hour dinner of sub par food, but we didn’t seem to mind with the view of the water and it being the start of our trip.

IMG_1010

Hotel: Bow Street Studios – Rachel quotes “this place is amazing to meditate in!”  Two story apartment with lots of space and serenity.  Very enjoyable.

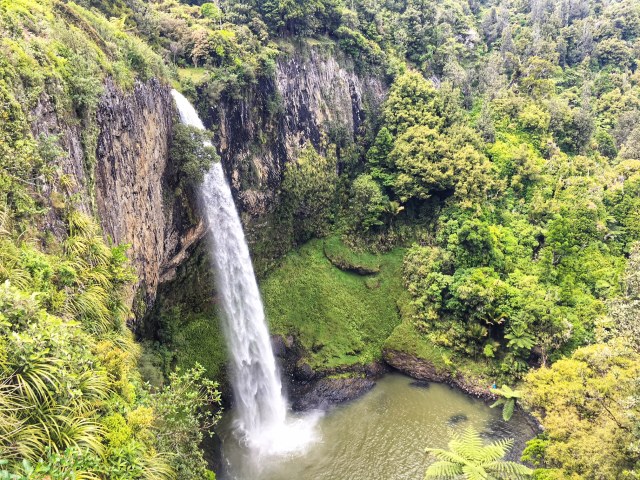
Day 3: Turanji – We woke up early on our own and had a lazy morning, with breakfast at this great cafe called The Shack. Driving out of town, we detoured to the Bridal Veil waterfall. It was much bigger than expected and made for a nice, steep morning walk to stretch our legs during a long day of driving.

Snapseed

We tried to stop at the Waitomo Glow Caves, however all the main tours were booked up for the day and it seemed a tourist sink hole.  There were people and tour buses everywhere and the cost of the tours were pretty hefty.  We opted to skip it on our trip, though other people have said it’s pretty cool.

We finished up the day by driving to Turanji, where we would be staying for the night before our big hike.  The town was a small trucker town, a bit run down.  We stopped at the local Tavern for bad cheese pizzas and some penny slots.  Rachel was the big winner, so that was decently exciting.

Hotel: Parklands Motor Lodge – simple, no-frills, inexpensive motel accommodation. Lots of truckers and few amenities.  The rooms were clean and it was nice to be able to order breakfast the night before and have it delivered at a certain time in the morning.  

Day 4: Northern Circuit The BEST part of our trip. We got up early this morning, had a big breakfast at the motel and finished packing our backpacks. Our carry on luggage went into the trunk and we began the half hour drive down to Whakapapa Village (our starting point for the Tongagiro Northern Circuit loop hike).

tong_map

***

Info on hut accommodations and our hiking route:

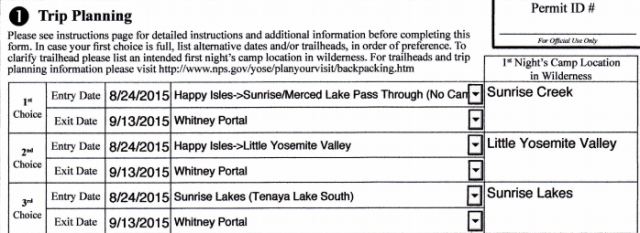
We had reserved our camping huts five months before our trip – which is highly recommended since the hike is highly sought after and the beds book up. Booking information and availability is HERE. The huts are awesome and well maintained.  Each has a Ranger that stays overnight and lays out important rules and information. The huts have varying numbers of bunkbeds, situated in a few rooms.  Privacy is limited, but the amenities are great for a camping spot.  There are gas stoves, bunks with bed pads, bathrooms (no showers) and heating/lights.  There isn’t a place to charge devices.  You should bring a sleeping bag, inside shoes (boots are not allowed), food and a pot to cook it in (along with dishware). The water is clean and can be consumed from the huts without treatment.

We opted to take the route counterclockwise, which is not the normal direction most hikers take.  I opted for this for a few reasons: less people, flatter first day (elevation wise), and hut availability.  Our original plan was to stop at two huts for the nights, the Oturere Hut and the Mangatepopo Hut. This plan would make our first day the longest (distance) at 23.5km, but our legs would be fresh.  The second day would have the most elevation/climb (~1900m, and 12km) and the last day would be a short out back to the Village (9.4km).  Our hike ended up going a little differently, as described below.

PACKING LIST

***

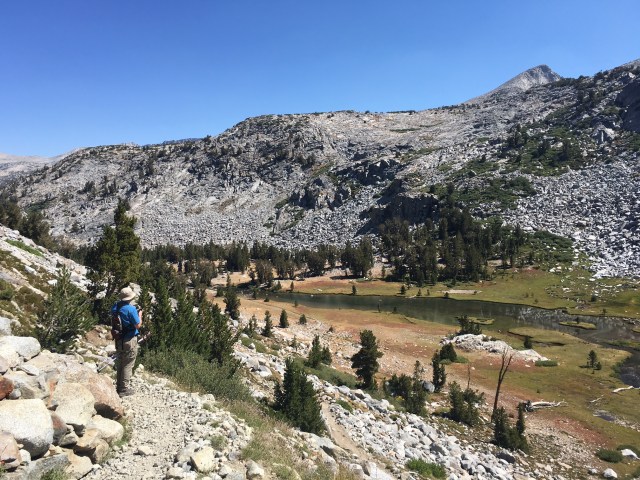
Once in Whakapapa, we checked in at the Visitor’s Center and got our parking pass. We left our car in the designated lot and got on the trail about 9:30am.  It was easy going and gorgeous from the start.  We felt like we were all alone for many aspects of it.  Given that we had a long day ahead of us, we only made two specific stops.  The first was a side trip to the Tama Lakes (worth it).  We dropped our bags and trekked to the lake with just our water bottles, making the extra distance a little easier.  The second stop was for a late lunch at the old Waihohonu hut.  “This was the first hut built in Tongariro National Park (1904) and is the oldest existing mountain hut in New Zealand. It was the base for the first recreational skiing in New Zealand. It was in active use for over 60 years and remains standing on its original site. The hut was registered as a category one historic place by the Historic Places Trust in 1993.” Pretty cool stuff! You cannot camp there but it’s neat to check out. We also made a brief stop at the new Waihohonu Hut to check out the amenities and use the bathroom.  This hut was by far the newest and nicest!

Convincing ourselves to keep going after that first 5.5 hours was tough, but we pushed on to try and make it to our hut with a few hours of daylight left. The scenery begins to darken and become more volcanic.  Really cool…especially when you realize that you are hiking through Mordor (Lord of the Rings) and circling Mt. Doom! Absolutely stunning and we barely ran into anyone along this stretch.  Arriving at our campsite around 6pm, we immediately began an evening of easy dinner and endless gin rummy games.  I think we were hard asleep by 9pm!

Recommended items to bring: sleeping aid and ear plugs!  There are other campers at the hut with you, going to sleep/waking up at very different times.

Food we brought for the trip:

  • Snacks: Clif bars, individual peanut butter packets, gushers/fruit snacks
  • Breakfast: Oatmeal, instant coffee/tea
  • Lunch: Tuna packages (with little mayo packets collected from fast food restaurants beforehand) and mixed nuts
  • Dinner: Easy mac, instant mashed potatoes, hot chocolate

Hotel: Oturere Hut – best camping accommodation I have stayed in! Obviously, it’s a no-frills scenario but it was super nice to not have to lug thermarests, extra layers, stoves, etc.  They have a campsite there that you can book for less money, but we found the hut to be totally worth it…and warm! Our main complaint was that the hut was shared among many people so sometimes you had to wait to use the stove and sleep still was difficult, given all the different sleep/wake-up patterns.  

Day 5: Northern Circuit We were woken up at 5am, when another guy in our bunk room decided to hit the trail at sunrise and needed to pack his stuff up.  Once up, we just decided to get a move on as well. I don’t do well on limited sleep and our legs/hips were sore, so we made an executive decision to skip our second hut reservation and push through for another long distance day.

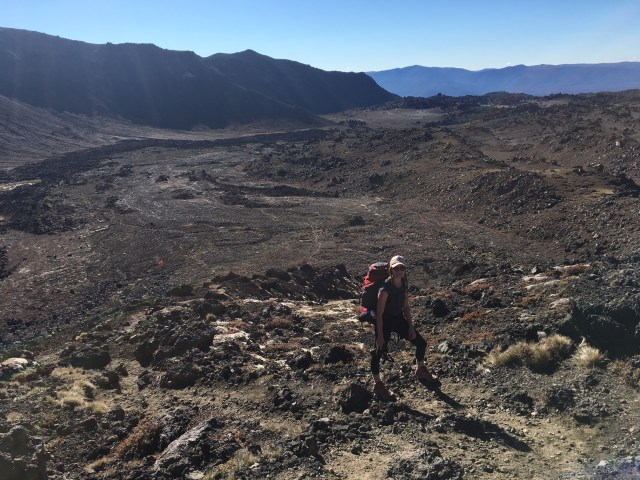
The first few hours were a gradual uphill climb with a few beastly ups that kicked our butts. The scenery was stunning though, as we were now totally immersed in the volcanic land.

IMG_1078

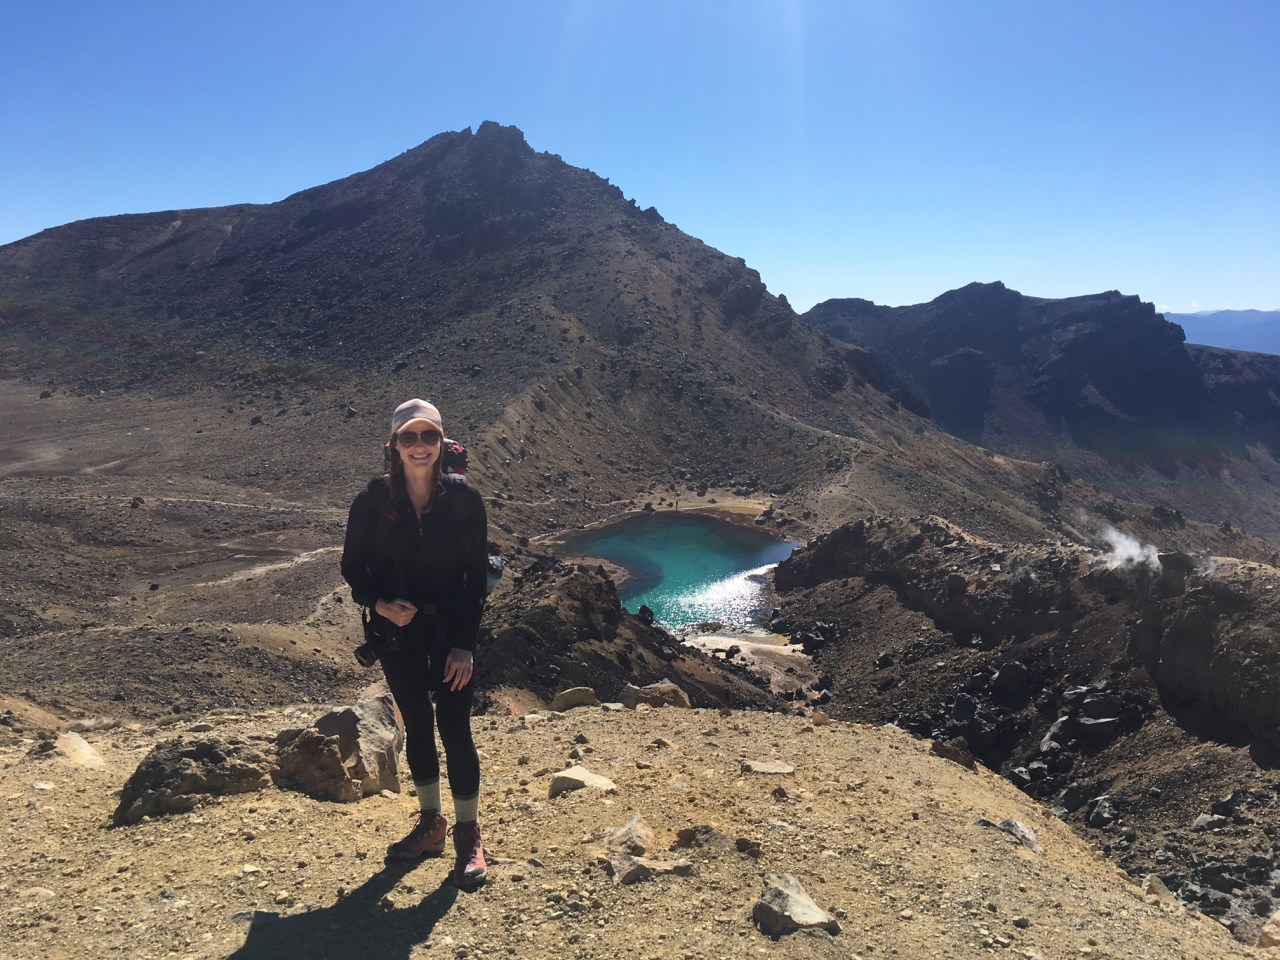
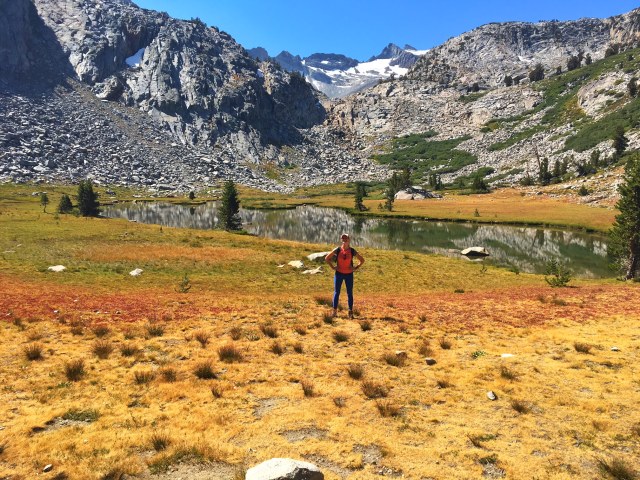
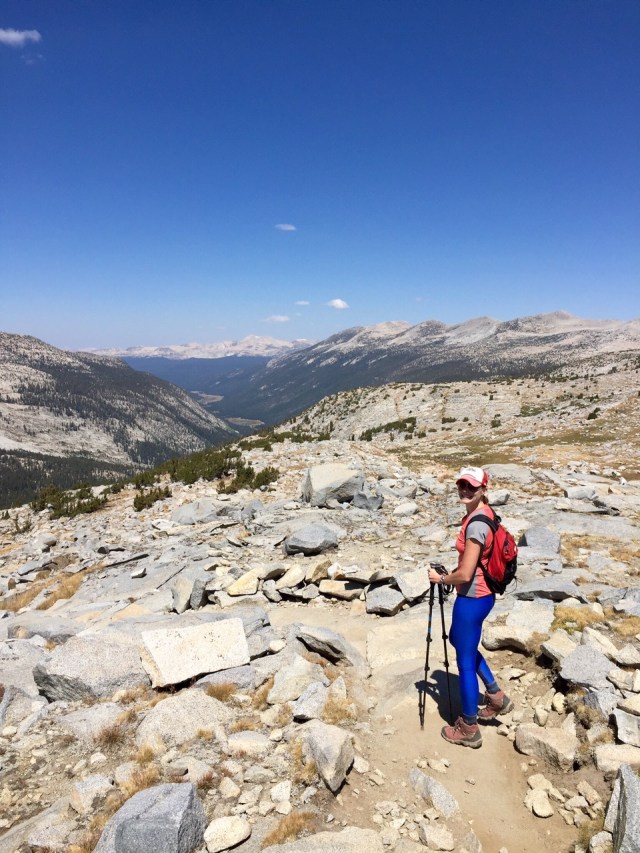
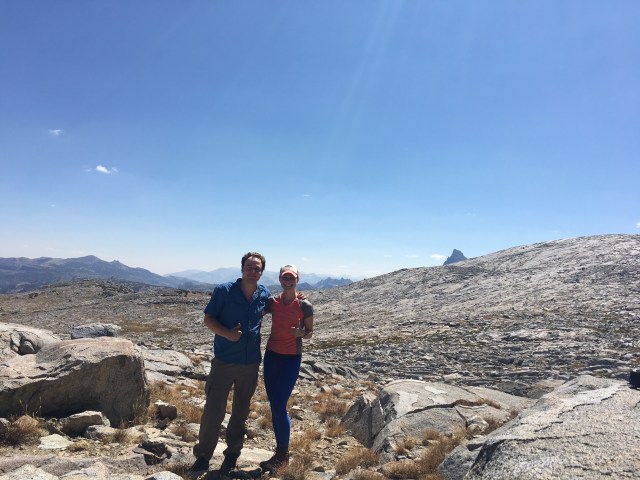
We came across the first of the Emerald Lakes and took a lunch break before ascending the steepest climb of the circuit.  These is also where the one-day “Alpine Crossing” intersects the main circuit.  Hence, people of varying hiking experience levels were everywhere! It was a bit chaotic and frustrating to navigate the traffic, but it definitely solidified our decision to NOT simply do the Alpine Crossing and instead hike the full loop. Since we hiked counterclockwise, we were forced to climb the uphill in volcanic ash…which gives a bit with every step (like walking in sand).  That was challenging but I preferred that to the opposite, where there were serious lines/waits to climb up the rocks. The view from the top was perfect, below shows “Mt. Doom” in the backdrop.

Once we came down the other side, we stopped at the Mangatepopo Hut to check it out and have a bite (it was around 1:30pm). This too was a nice set-up, perhaps a little cleaner than the hut we overnighted in.

IMG_1123

The final hike out was deceiving.  We noted that the signs said 3.5-5.5 hours, depending on weather conditions.  We quickly realized why that was – most of the final few miles is an uneven and not-maintained trail. There are challenging rocky areas and trenches dug in, making it difficult with boots and a pack.  We commented that if it had been raining, we would have been screwed.

We finished the 26 mile loop at around 5pm that afternoon, back in Whakapapa Village.  After picking up our car, we made the hour drive up to Taupo, where we reserved a last-minute hotel room.  Embarrassingly enough, as true Americans, we stopped at Burger King for a much needed fatty, delicious burger and fries. The hotel was perfect, with an excellent (well-needed) hot tub and free LAUNDRY!  We threw our entire backpacks into the washer and were good to go. The hotel owners were really sweet and had excellent restaurant recommendations.

Hotel: Gables Lakefront Hotel – highly rated on TripAdvisor and worth the reviews.  The rooms were very clean and substantial, with comfortable beds.  Most rooms have private hot tubs, though those were booked up.  So we settled for the communal hot tub, which we had to ourselves anyways!  The rooms have home-made cookies and all the coffee, tea, etc you could ask for. It was also right on the shore of Lake Taupo, so this made for a beautiful sunset view. The laundry was an excellent addition.

Day 6: Taupo & Rotorua Our trip was beginning to wind down and we were exhausted from the hike, with sore legs and bruised hips/collarbones.  Hence, this day was more of a relaxing endeavor.  We stopped by a few of the tourist attractions on the way out of Taupo, including the Craters of the Moon geothermal area.  This was actually pretty cool ($8/person) and provided a nice excuse for a short walk around the grounds.  There are meteor craters, geothermal hot springs steaming, and lots of cool colors in the landscape.

IMG_1148

We decided to relax the rest of the day and drove up to Rotorua.  We booked 3-hour massage treatments at our hotel (yes, this was overindulging for sure).  They have an in-house spa and it was fabulous.  One hour massage, followed by a honey scrub/mud wrap and then a facial to end it.  Our bodies felt totally rejuvenated afterwards! We ordered great pizzas from Pizza Imperfetto in town and were in bed by 9pm. Perfection.

Hotel: Silver Fern – lovely accommodation with private hot tubs in the room and an in-house spa with reasonably priced treatments.  The hosts are lovely people! Short walk into town. Highly recommended.

Day 7: Rotorua It was nice to stay in the same hotel for two nights in a row. We spent this last free day completely chilling out.  We took private hot tubs sessions in our room, and ventured out to the Redwoods Forest and walked along the treetops.  That was cool and an educational experience.

IMG_1156

IMG_1161

Hotel: Silver Fern 

Day 8: Back to AKL The roadtrip back to the airport!  Car return was easy, as was airport check in.  The American Airlines lounge was a nice stopping point in the airport, where we enjoyed our final class of local Sauvignon Blanc.

Next on the list…the south island!

Kauai, Hawaii

An oasis from the everyday chaos in our urban lives.  Up with the sun, down with the sun. We loved every aspect of our first trip to Kauai (May), so much so that we scheduled another for a few months later (October)! Of course, there is always the beach, surfing, paddleboarding, etc…but below are a few of my highlights from both trips, aside from the standard beach activities:

Type of Trip: Self Planned 

Hotel: St. Regis – GORGEOUS, luxury hotel on the north shore of the island.  They spared nothing in creating this beautiful hotel.  If you don’t stay here, then you must at least come for a sunset cocktail on the balcony – stunning views overlooking the ocean.

Transport: LAX-LIH (non-stop), then rental car at Advantage.  The first time we went, we tried to go cheap on the car and it was a mistake.  We rented at Fox.  Not only was it far off the airport, but it took an hour to leave the lot due to the sales associate trying to upsell us on every insurance policy (even after I had refused multiple times).  Advantage was a much smoother process and an easy return.

Activities:

  1. HIKING: Kauai has some epic hikes, many of which we have explored.  Our favorites (within an hour drive of the resort) were:
    • Nualolo Trail: (7.6 miles round trip) This hike in Waimea Canyon started out pretty rough.  The mud was slippery and you are mostly descending for the first half through covered forest (hence, poor traction led to multiple slips).
      img_7238

      Nualolo Trail

      If you wait it out, the trail opens up around mile 2.5 and then the extreme dropoffs begin!  It is gorgeous, and slightly frightening.  I have a fear of heights, so I almost couldn’t make it through.  Glad I did though, as the vista is crazy cool. We hiked back the same way. The Nualolo Cliff trail, which connects this hike to the Awaawapuhi Trail is closed due to erosion.  We hope to try the Awaawapuhi trail next trip.

    • Hanakapiai Falls Trail: (6.9 miles RT) This hike shares the first 2 miles with the famous Kalalau Trail (which you need to request a permit far in advance for).  After that, you head uphill to a massive waterfall.  We packed a small lunch, which we ate at the base of the falls.  A must do, especially if you do not have a permit for Kalalau.
    • Sleeping Giant:  (4 miles RT) This was a nice one, if time is an issue.  It was short and steep, with cool rock structures and views from the top.  We have done this one multiple times.
    • Secret Beach: It’s not really a secret…but you should go. Beautiful, expansive beach with huge cliffs behind you.
    • Okolehao Trail: (5+ miles RT) This one was aggressive as we couldn’t seem to locate the end…we hiked past the main vista viewpoint (2.5 miles) and continued into the rope-assisted trail.  It was muddy and didn’t seem to be much traveled.  The vistas leading up to this point were cool though, so next time we will likely stop there.
    • Wai Koa Loop: (5 mile loop) an easy, muddy trek that is all flat. It guides you through the botanical gardens.  Make sure to stop at the Stone Dam.  It’s like a little Garden of Eden.
    • Some other sites I found helpful: Full List and Top Five
  2. ADVENTURES:
    • Koloa Ziplining:  Super fun!  The guides were awesome and the ziplining cords are long and fast.  It cost around $150/each but we felt like it was one of the best activities we have done there.
    • Luau Kalamaku: We ordered discounted tickets HERE for around $95/each, which included dinner and the show.  It was totally touristy, but we enjoyed it.  I thought the food was fine but the show was a neat experience.  Either way, it gave us something different to do on our vacation!
    • Self-driving: We drove around the perimeter of the island to check out Waimea Canyon State Park.  The drive itself wasn’t that pretty but the views once you reach the canyon are indescribable.  It is not that dissimilar from overlooking to Grand Canyon.  fullsizerender-2
  3. RESTAURANTS:
    • Tiki Man Pizza: We really liked this place!  Went on a Saturday night, there was a good crowd and live music.  The pizza was fine, it was more about the atmosphere.
    • The Dolphin: felt overrated.  It was expensive sushi, and the service was slow and disorganized.  Not a favorite.
    • Bar Acuda: cool vibe, tapas.  Was expensive but nothing stood out to us.
    • Kilauea Fish Market: excellent fresh fish and poke!
    • Lighthouse Bistro: this was a favorite.  Romantic vibe but not overly done.  Our waitress made the dinner even better.  She was hilarious and honest about which items to order.
    • Foodland (Grocery): great spot to pick up a few items for hiking lunches, snacks and breakfast in your hotel room.  The sushi and coffee were great as well!
    • 9th Island Sports Pub & Grill: we were looking for a spot to watch the Cubs baseball game and stumbled across this gem.  Great crowd, solid bar food though they don’t have a liquor license.  However, they do let you go to the grocery store next door, buy beer and bring it into the pub at no cost!  Awesome spot to watch sports.
    • Kountry Style Kitchen: fabulous greasy spoon.  Breakfast was big and hearty.
    • Hideaways Pizza Pub: we were looking for a restaurant outside the hotel that we could walk to – this was it.  Despite the reviews, we thought it was just fine.  Lots of families with kids and local residents.
    • Tip Top Cafe: a bizarre favorite, near the Lihue airport.  Typical Hawaiian fare, we stopped here after landing both trips.  Full of locals and inexpensive.  We ordered the “surfer combo” (or something like that).  I still crave the macaroni salad.

Mahalo, Kauai!


John Muir Trail (JMT)

Originally, my best friend and I planned to hike the entire John Muir Trail (JMT) over 4 weeks, starting in late August 2015 (known as a “thru hike”).  Due to an injury and schedule conflicts, we realized that we would have to break the hike into a handful of trips.  Regardless, we spent a considerable amount of time planning for this adventure and I thought it would be helpful to share with others planning for the same epic hike!  Note: I am not a super rugged camper.  I can camp and hike with the best of them, but I do like to have a few small comforts along the way.  Basically, these recommendations apply to the average hiker (I couldn’t do ultra light).

First off, you will need a permit to hike most of the JMT and they definitely check.  A ranger asked my brother and I for our on the last day of my second JMT excursion.  Play by the rules, or else risk a hefty fine.  When we had to cut our trip shorter, we discussed with the ranger while picking up our permit and they were able to amend the days on the spot.  So basically, request a permit for the maximum amount of time you plan to spend hiking the JMT, and you can always whittle it down later.

Step 1: Request a permit.  This is the PERMIT WEBSITE.  You can begin requesting them exactly 24 weeks (168 days) before your requested start/entry date.  Be on the ball with this as the permits are in high demand and will likely be gone for your day if you don’t submit exactly 168 in advance.  You have to fax in the form or get someone on phone.  I ended up using a free online fax program (Nextiva or eFax) to send my request once every morning (I sent at 8am every morning).  It took me about a week of trying every day in order to get a successful permit.  So plan on building a buffer around your start date, for personal planning.  Only one person from your party should apply each day.

You will also need to know your start and end trailheads.  Our preferred trailheads were:

  • ENTRY: Happy lsles->Sunrise/Merced Lake Pass Through (meaning we had to hike a very long first day from Happy Isles up past the main camp to the Sunrise area.  A longer hike day, but higher probability of getting a permit).
    • First night camp: Sunrise Creek
  • EXIT: Whitney Portal (this is the exit trailhead for those planning to cover the whole JMT and hike Mount Whitney at the end).
  • Exit Yosemite Park via Donohue Pass – YES
  • Half Dome permit – NO (we weren’t going to do this side hike as a part of our trip)

We put in a few other entry trailhead options, with corresponding camp sites (in case our first choice wasn’t available).

permit2015

Example JMT Permit (full hike)

Step 2: Planning.  Once you receive the glorious confirmation email telling you that your permit has been reserved, now you can start planning the logistics.

  • Plan to have someone pick up your permit the day before the hike begins (so that you can get an early start on entry day).  We picked ours up at the Tuolumne Meadows Wilderness Center (open daily 8:30 am to 4 pm.) – Tuolumne Meadows Lodge Rd, Yosemite National Park, CA 95321.
  • Arrange to drop one car at the exit portal and one at the entry portal and leave them for the entirety of your hike.  Another option is public transportation or having a friend pick you up at the exit or drop you at the start.
  • Purchase or rent a bear canister.  This is required!  I got mine here and loved it: BEAR CANISTER.  I loved that it is clear so I could see everything inside.  Additionally, it’s lighter than most options and the lid doubles as a pan for cooking!
  • Get your gear.  Below is the gear list I created for our trip (I carried way too much on my first excursion on the JMT…then I leaned the list out based on the experience.  You really do not need as much as you think you do!  A light pack is key.)
  • Full JMT Notes
    • Total mileage: 221 miles
    • Plan on < 15 miles/day (we averaged about 10 miles/day)
    • 20-25 lb max for your pack
    • Expect cooler nights (esp at higher elevations)
      • Day: 65-70 degrees
      • Night: 30-45 degrees

Erin’s Packing List:

  • Camping
    • Cooking supplies
      • Stove (jetboil)
      • Stove fuel canisters
      • Dish soap (Dr. Bronners or Campsuds)
      • Dish sponge
      • Spork
      • Pot (lid of bear canister?)
      • Coffee Mug
      • Firestarter/lighter
      • Purification Drops (AquaMira) or Steripen
    • Bear canister
    • Sleeping
      • Camp pillow
      • Sleeping bag
      • Sleeping bag liner
      • Tent
      • Thermarest
      • Thermarest chair converter
      • Headlamp + batteries
    • Navigation
      • Map
      • Compass
  • Clothes
    • Warm coat/Insulating layer – down and/or wool (no ski jacket)
    • Fleece jacket (synthetic)
    • Rain coat – waterproof shell
    • Waterproof pants
    • Thin inner socks (polypropylene)
    • Thick outer socks (NO COTTON – preferably wool with high density loops)
    • Light boots with quality insoles (ArchCrafters)
    • Synthetic underwear (3 pair)
    • Cotton underwear (for night – 2 pair)
    • Long underwear (wool preferred)
    • Pants that convert to shorts (1)
    • Dryfit tops (2-3)
    • Quick-dry sports bra (2)
    • Warm pajamas (fleece)
    • Comfy socks/slippers for night (1)
    • Warm hat & gloves
  • Accessories
    • First Aid Kit
      • Moleskin
      • Hand sanitizer
      • Large safety pin
      • Neosporin
    • Wearables
      • Hat (that covers back of neck)
      • Bandanna
      • Small towel (dries quick)
      • Sunglasses (polarized)
      • Watch
      • Trekking Poles
    • Toilet Paper
    • Extra ziplocks
    • Garbage bag
    • Camera
    • Duct tape
    • Water bottles or Camelbak
    • Superglue
    • Toiletries (nothing scented!)
      • Toothbrush + Paste
      • Soap
      • Shampoo/conditioner
      • Chapstick
      • Nail clippers
      • Medications (Ambien, pain, inhaler, diarrhea)
      • Tampons (?)
      • Sunscreen
      • Bug spray
    • Baby Wipes
    • Rescue Devices
      • Whistle
      • Compact mirror
    • JMT trail book
    • Book to read
    • Deck of cards

Step 3: Food List.  This will definitely take some planning if you are aiming to hike the entire trail.  You will want to ship food supplies packages in advance to you various stops.  It’s nice to bring some fresh vegetables and fruit for the first few days.  We were also surprised to find that we were less hungry the higher and longer we hiked in elevation.  So we definitely overpacked on food, which made our bags super heavy!  My favorite foods along the hike were peanut butter packets, string cheese, beef jerkey, dried pineapple and mango, chocolate anything, oatmeal, and instant mashed potatoes.  We found that the less intensive the prep/cooking/cleanup was, the more we enjoyed the meal. 🙂  Emergen-C, lemonade and crystal light packets were phenomenal for covering the taste of the purification drops in our water.

Food Packing List Ideas:

  • Trader Joes or buy in bulk (~2lb/day)
    • Quick cooking grains & flavors
      • Couscous
      • Quinoa
      • oatmeal
    • Tuna + mayo packets
    • Nuts
    • Dried berries
    • Trail Mix
    • Powdered coconut milk
    • Powdered milk
    • Curry powder (and other packet seasonings)
    • Instant hot chocolate & tea
    • Oranges
    • Hard candies
    • Protein/electrolyte pouches
    • Freeze dried food
    • Water Flavor (crystal lite)
    • String cheese
    • Jerky
    • Tortillas
    • Energy Bars
    • Salami and sliced meats
    • Granola
    • Small candy
    • Mac & cheese
    • Instant soups
    • “Tasty Bite” – Indian food packs
    • Fresh veggies (for first few nights)
    • Freeze dried meals
    • Chocolate
    • Emergen-C
    • Cheeze its
    • Peanut butter
    • Sweet potato chips (salty)
    • Dehydrated foods
    • Instant pancake mix + syrup (spatula?)
    • Ramen noodles
    • Pop tarts
    • Instant mashed potatoes

Notes I gathered from various sites that proved very helpful:

  • Choose the right foods: Dense, high-calorie options are best: Tortillas instead of bagels; dried fruit instead of oranges.
  • Plan every meal: Avoid bringing too much (or too little). Lay out each day, divide portions, and pre-measure mixed foods like rice and pasta.
  • Repackage: Get rid of bulky boxes and inflated packaging. Put food and toiletries into resealable bags or small containers. This saves space and reduces garbage. Make sure to keep the instructions and label each item.
  • Check that it fits: Before you start your trip make sure ALL your food, trash, toiletries, and scented items will fit inside your canister on the first night.
  • Carry the first day’s food outside of the canister: Snacks, lunch, and dinner. Just be sure to keep that food with you at all times.
  • Minimize your toiletries: Just like food, pack small and don’t bring more than you need. Put toothpaste, sunscreen, bug repellent, etc. into small reusable containers.
  • Use your canister correctly: Establish your kitchen about 50 feet from your sleeping area. Make sure to properly close the lid securely at all times. Leave the canister on the ground in an open flat area away from cliffs or streams.
  • All scented items (food, toiletries, and garbage) must fit inside the canister when left unattended.img_1940

Step 4: Ship food packages to desired pitstops.  Check out each location’s website to determine exact instructions and timeline of when to send.  Most plan to send 3-5 days of food.

Resupply Points:

  • Address your package to:
    • YOUR NAME; c/o General Delivery; Address of the Resupply Point; HOLD UNTIL (date)
  1. Tuolumne Meadows (22.8 miles)
  2. Red Meadows Resort/Mammoth Post Office (59.2 miles) – redsmeadow.com
    • $35 for mailed packages (pick up btwn 7am and 7pm)
    • Red’s Meadow; PO Box 395; Mammoth Lakes, CA 93546
  1. Vermilion Valley Resort (88 miles) *Difficult to get to; NOT ideal
  2. Muir Trail Ranch (107.9 miles) – page 25 – muirtrailranch.com
    • $65/25lb bucket (5 gallon paint canister drum)
    • Has power strip to recharge electronics
    • Store carries fuel, batteries
    • Lodging available for a fee with reservation
    • Muir Trail Ranch; PO Box 176; Lakeshore, CA 93634
  1. Independence (179.4 miles)

In my research, it seemed the best options for resupply were:

  • Tuolumne Meadows (if you have a resupply package here, you can carry very minimal weight for your first few days.  This is awesome because you will be gaining a lot of elevation in those days and you will feel every pound!).  Tuolumne Meadows is right off the trail, so not much of a detour.
  • Red Meadows Resort.  Good place to stock up on your next resupply…
  • Muir Trail Ranch.  Excellent resupply point, basically marking the halfway point on the trail.  You can make a reservation to sleep there for a night or two, if desired.  You will want to send the largest resupply package here as most try to go from here through the end at Whitney without stopping again.  (Independence resupply is considerably off the trail so would cost you some time to get there).

Step 4: HIKE!  Our two short hiking adventures on the JMT are outlined below.

MILEAGE CHECKPOINTS


JMT – Part 1: August 2015: Happy Isles to Tuolumne Meadows (21 miles) ROUTEimg_2102

  • Day 1 – woke up at the crack of dawn in order to take our time on the continuous ascent.  Gorgeous views of Yosemite Valley and Half Dome.
    • Camp: Near Sunrise Creek, just past the fire-ravaged forest. img_2108
  • Day 2 – we had a fitful sleep as a bear tried to eat the stove of our neighbor’s fullsizerender-1
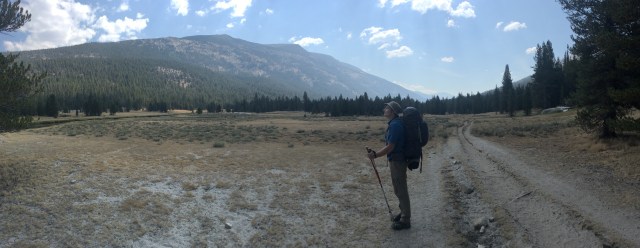
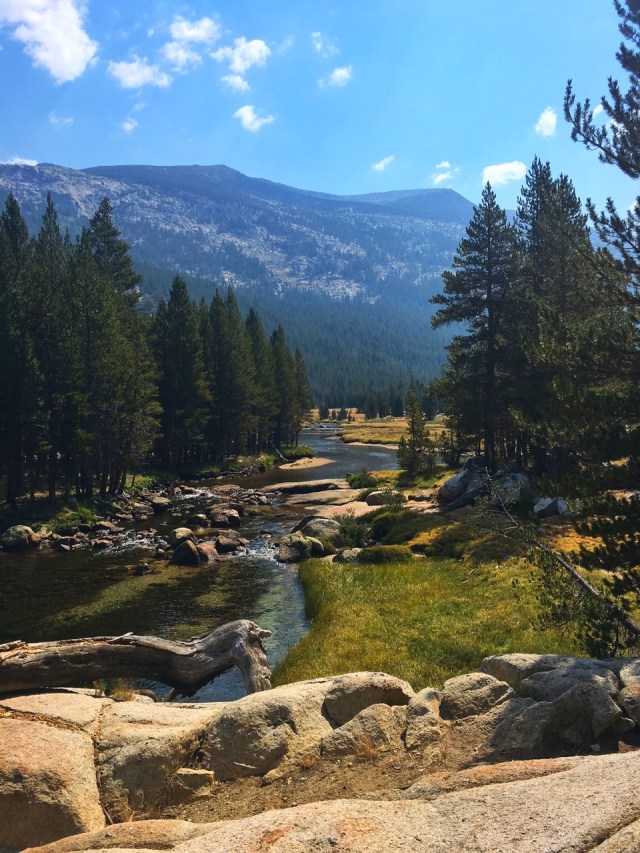
campsite!  We woke with the sun and made our way to Cathedral Lakes (our second camp site).  The meadows outside Tuolumne are stunning.  They seem to go on endlessly.  We passed Sunrise High Sierra Camp, where we stopped for lunch.  We got to Cathedral Lakes fairly early, which gave us a pleasant break.  We swam in the frigid water and set up camp.  We enjoyed hot chocolate by the water’s edge and played cards.  Perfect end to an excellent day.
    • Camp: Cathedral Lakes (this is a MUST.  We could have stared at the mountain reflection all day)
      fullsizerender-4
  • Day 3 – Due to the stress of the injury, we decided to hike out at Tuolumne Meadows. From there we grabbed the bus back to Happy Isles, where we picked up our entry car.  We enjoyed greasy pizza and celebrated with a glass of wine.  We then drove to get our second car from our planned exit point (Mammoth – Red’s Meadow).img_2213

JMT – Part 2: August 2016: Lyell Canyon (Tuolumne Meadows) to Devil’s Postpile (31 miles) ROUTE

  • Day 1 – hike from Tuolumne Meadows to Lyell Canyon.  Stunning!  Words cannot describe the vast open meadows and the sudden build of the mountains at Donohue Pass.  My brother and I opted to camp just before the footbridge that begins the ascent to Donohue Pass.  Lovely campsite that felt very secluded and close to a great water source.  A few deer even visited our campsite.
    • Camp: Lower Lyell (before the footbridge)img_6590

      img_6685

      Our favorite view in the meadows.  Too bad you aren’t allowed to camp here!

  • Day 2 – Our plan was to hike over Donohue Pass and onward to Island Pass, where we would stay the night.  Yet, as fate would have it, another conflict required us to shorten the excursion.  So we opted to pack up our camp and leave all the gear at our camp site.  We then took light daypacks and hiked up to the pass to take in the views.  Totally worth it!  We practically ran down the mountain back to our campsite.  From there, we picked up our packs and hiked back out at Tuolumne.  An intense 18-mile day!
    img_6619

    On the ascent to Donohue’s Pass

    fullsizerender-5

    Upper Lyell…had we known, we might have camped here!

    img_6671

    Donohue’s Pass!

    img_6637

    My brother and I…another successful trek!

If you have any questions, please reach out at any time!  Happy to provide any insight on camp sites, mileage, packing lists, etc.  Bit by bit, I will get through this whole trail. 🙂

“Of all the paths you take in life, make sure a few of them are dirt.” – John Muir

Rafting the Colorado River – Grand Canyon (September Launch)

Upon returning to the world of technology, hot showers and flushing toilets, I wanted to share our inspiring adventure from the last three weeks rafting down the Colorado River, inside the Grand Canyon.  These excerpts come directly from my highly-classified journal.  For those not aware of my journal entry style, I assign a title to each of the 18 days of the trip, along with daily highlight.  Here goes!

Type of Trip: Self-planned on a private permit, 18 people among 5 rafts, used food service company to plan meals

Dates: September 2006

Hotel: The great outdoors!  Phantom Ranch is a great half way point to hike in/out

Transport: Fly into Phoenix and drive to the launch point via shuttle/personal car.

Day 1: “The Launch”  Lee’s Ferry in Marble Canyon

  • Final rigging of the rafts, rafting a bit too long and having to eat PB&J sandwiches in the dark….mmmmm, yum.  Everyone reveals their instrument (required by our trip leader…the Coyote, aka my uncle).  Dick manages to misplace his trumpet mouthpiece in the sand, sad being that it is only our first night.  The first box of fine Merlot is cracked open.

Grand Canyon Trash Tours 2006 001

Day 2: “Dancing for Twizzlers” Rider Canyon, just below House Rapid

  • The “young boat”, manned by oarsman Jess and passengers Matt and myself…established a fun game in order to prove one’s worthiness of a highly coveted Twizzler – dancing.  Chris’ boat was also quite competent at the game.  Soon, all boats were participating as a silly method to stay warm as our first few days were chilly and rainy.  This day marked the famous birth of the “underwear tree” (our clothes were perpetually wet), when beef stroganoff became a regular in the leftovers, the “Birthday song” made its debut, and “ziplocking” became a verb.  Group dance parties by the camp fire becomes a regular evening event, along with group jam sessions (Jess brought an electric piano, Matt – guitar, me – flute).  Apparently, if one is to depart on a river excursion and there is a portable, battery-operated piano along, it is in your best interest to memorize the words to Poison’s “Every Rose Has it’s Thorn”.  Lastly, Brian was the victim of a stealth robbery of his food bag…between those ringtails, scorpions, and soon-to-be-discovered vicious tent carolers…one must always sleep with one eye open.
  • Day hike: North Cyn – it rained quite a bit that day, but we were still able to explore a lot of the canyon.  We sought refuge under a large rock outcrop and had lunch there.

Grand Canyon Trash Tours 2006 007

Day 3: “Three Chipmunks Band” Shinumo Wash, Red Wall Cavern.

  • Slow rapids day though the “Roaring 20’s” rapid definitely left its mark on the Hafner boat, Grand Canyon Trash Tours 2006 043
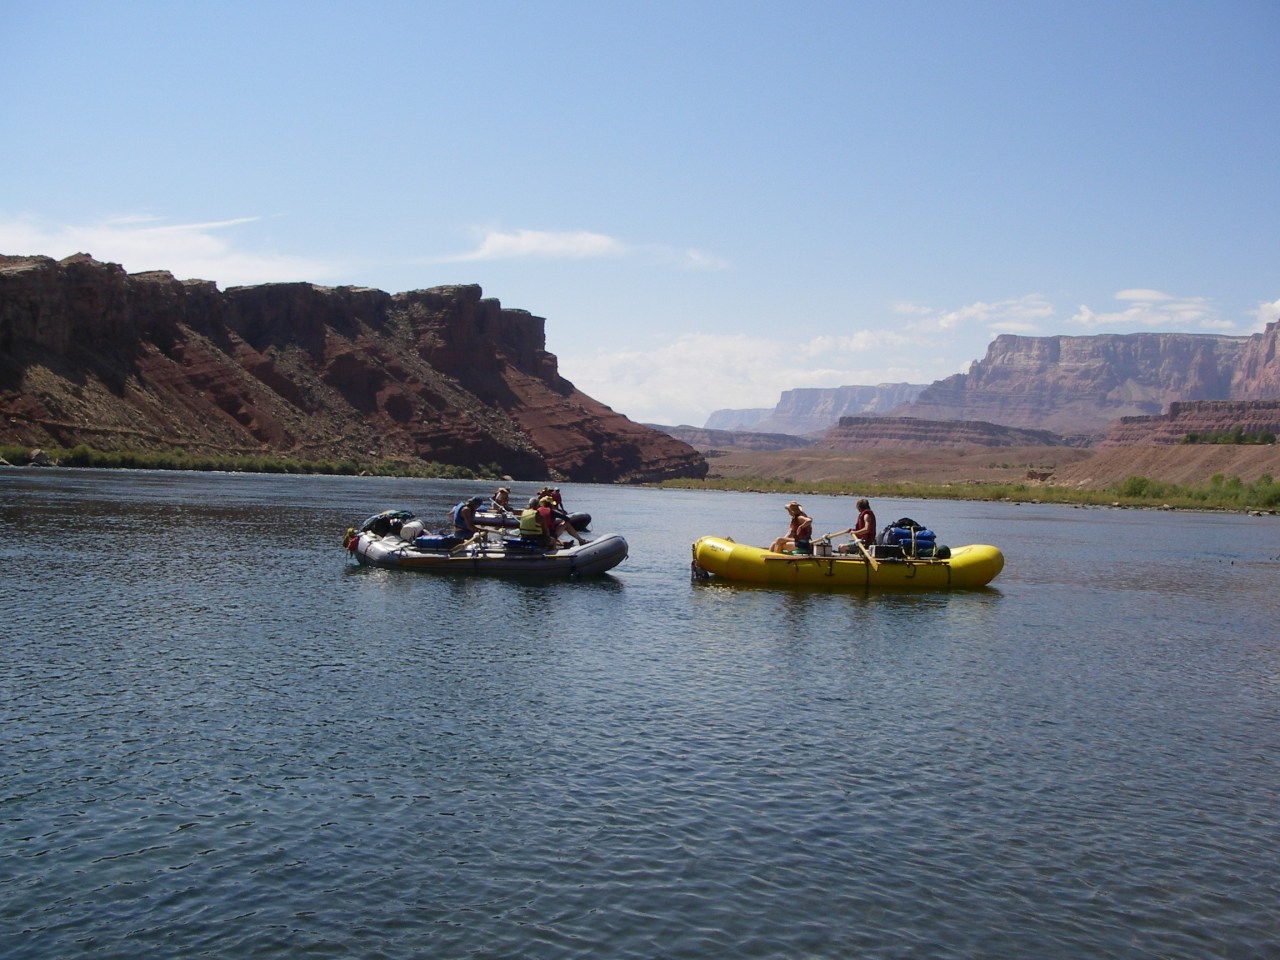
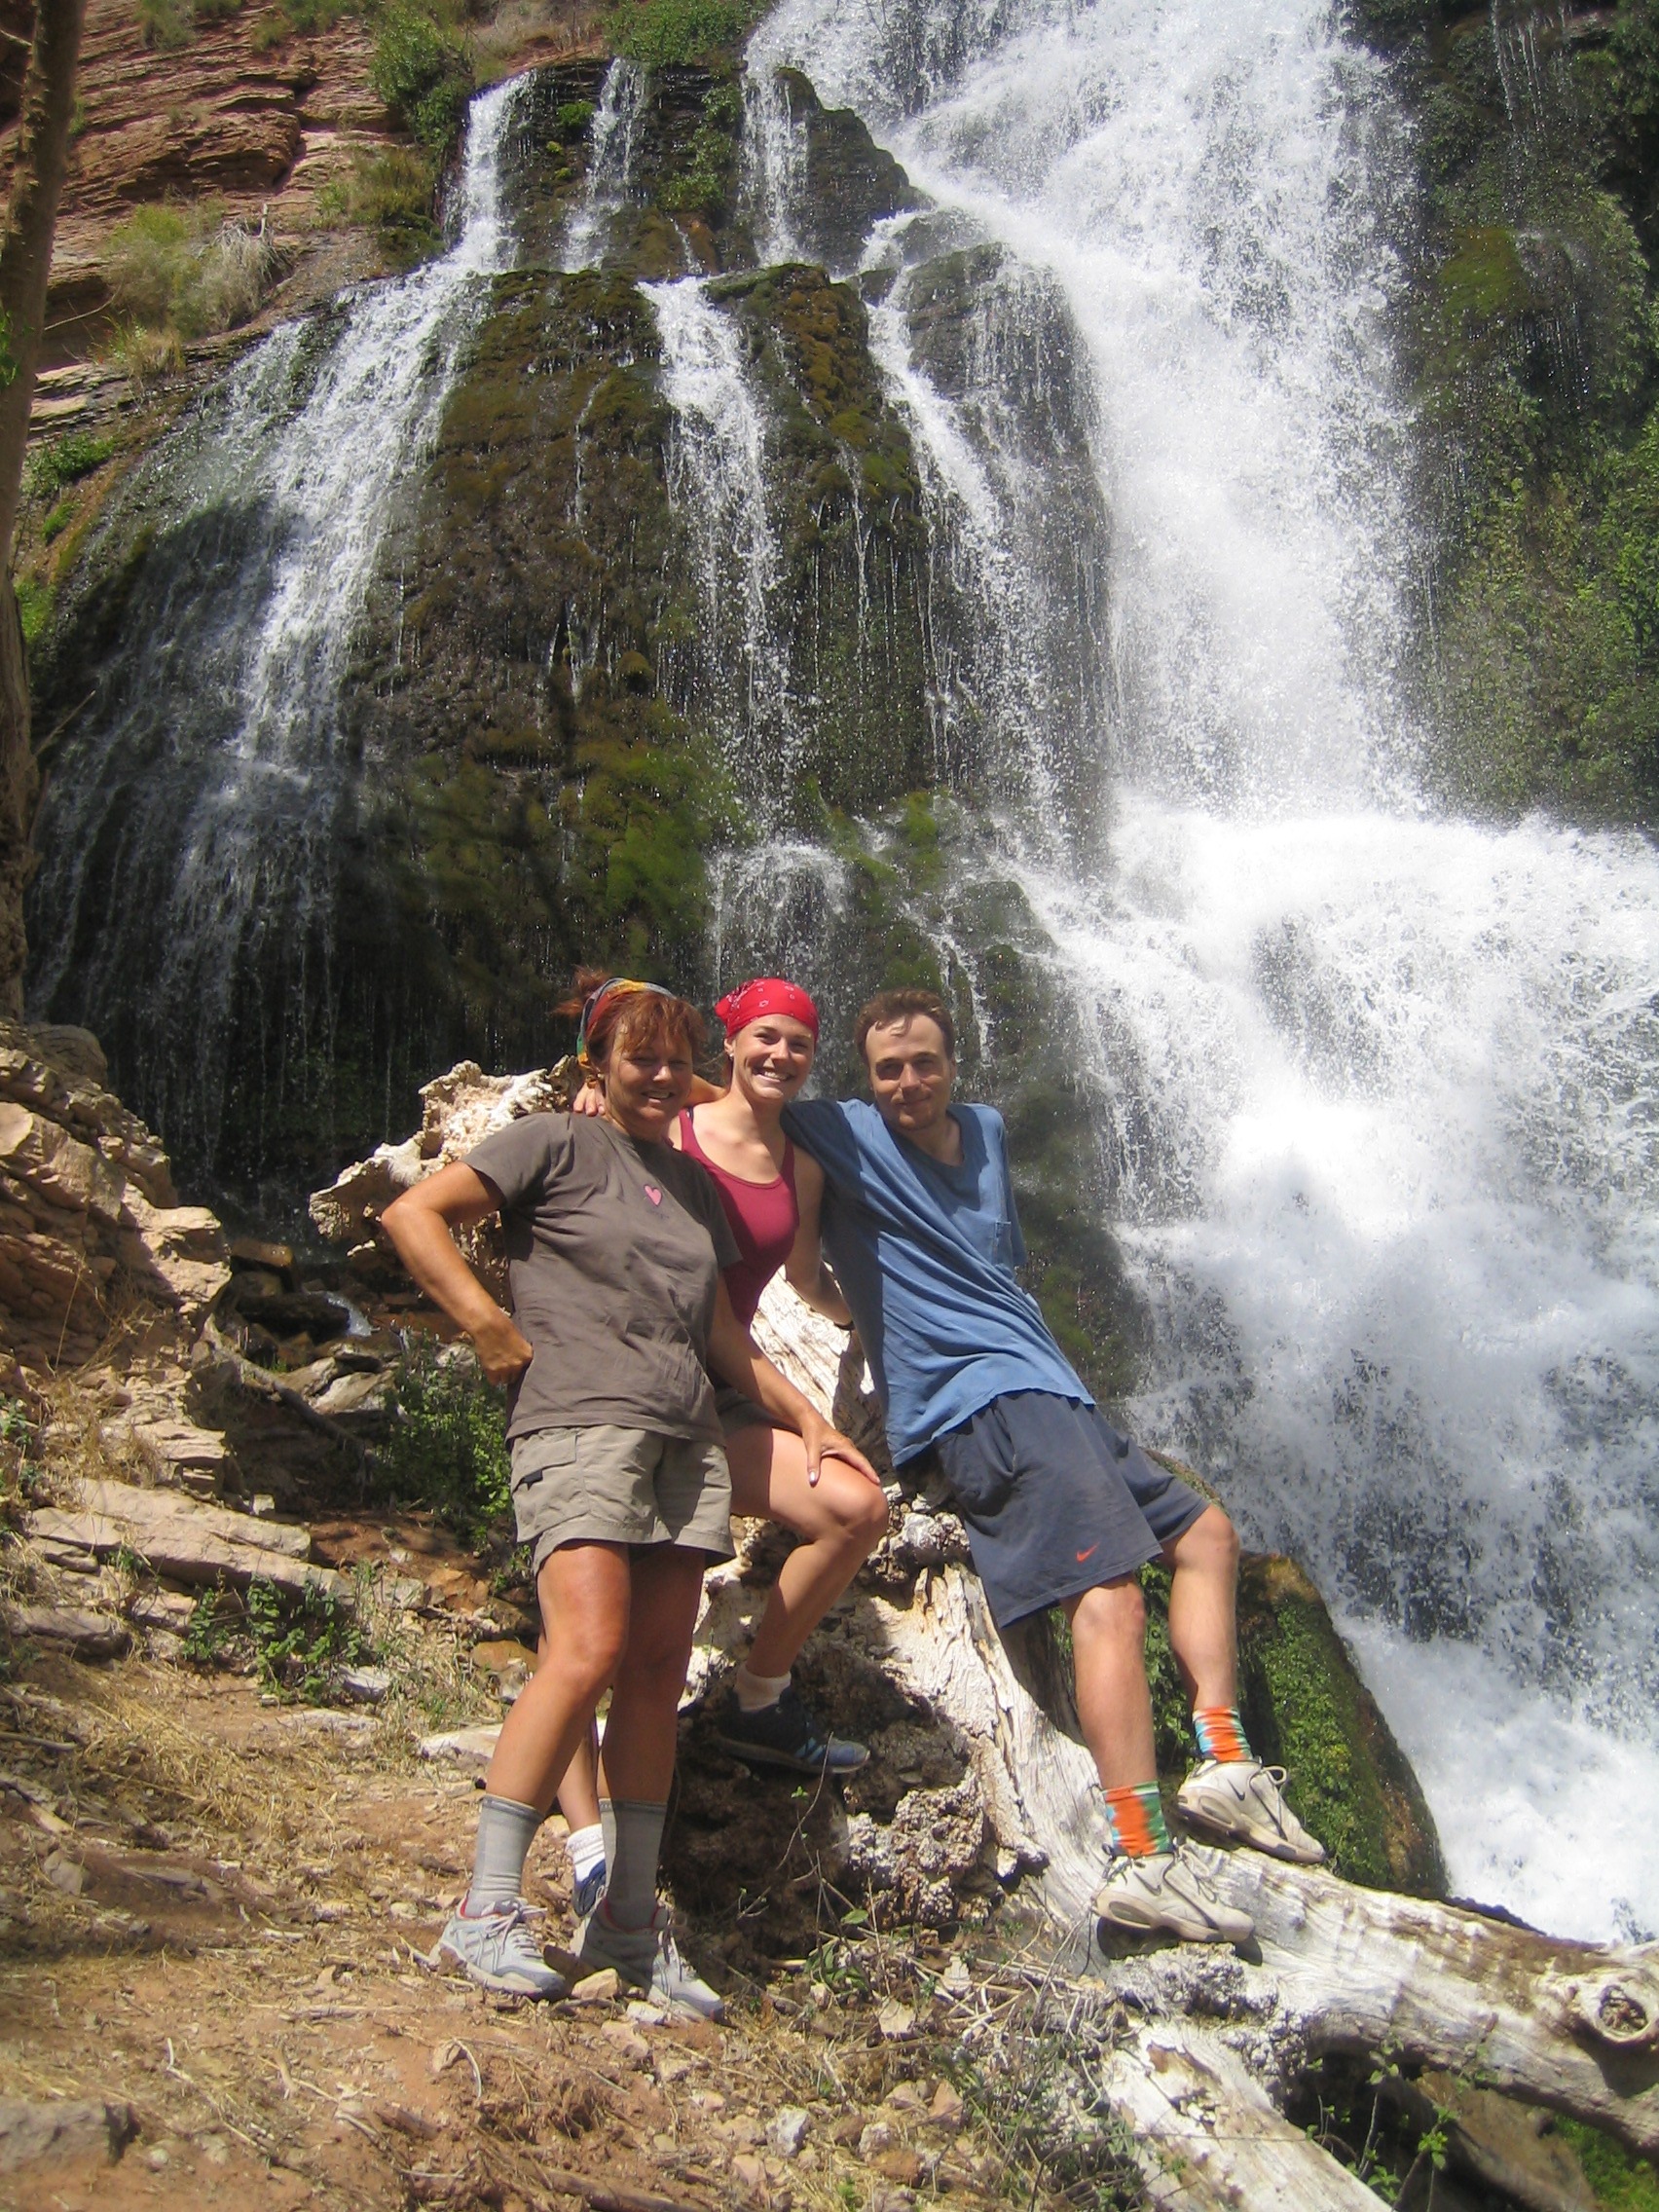
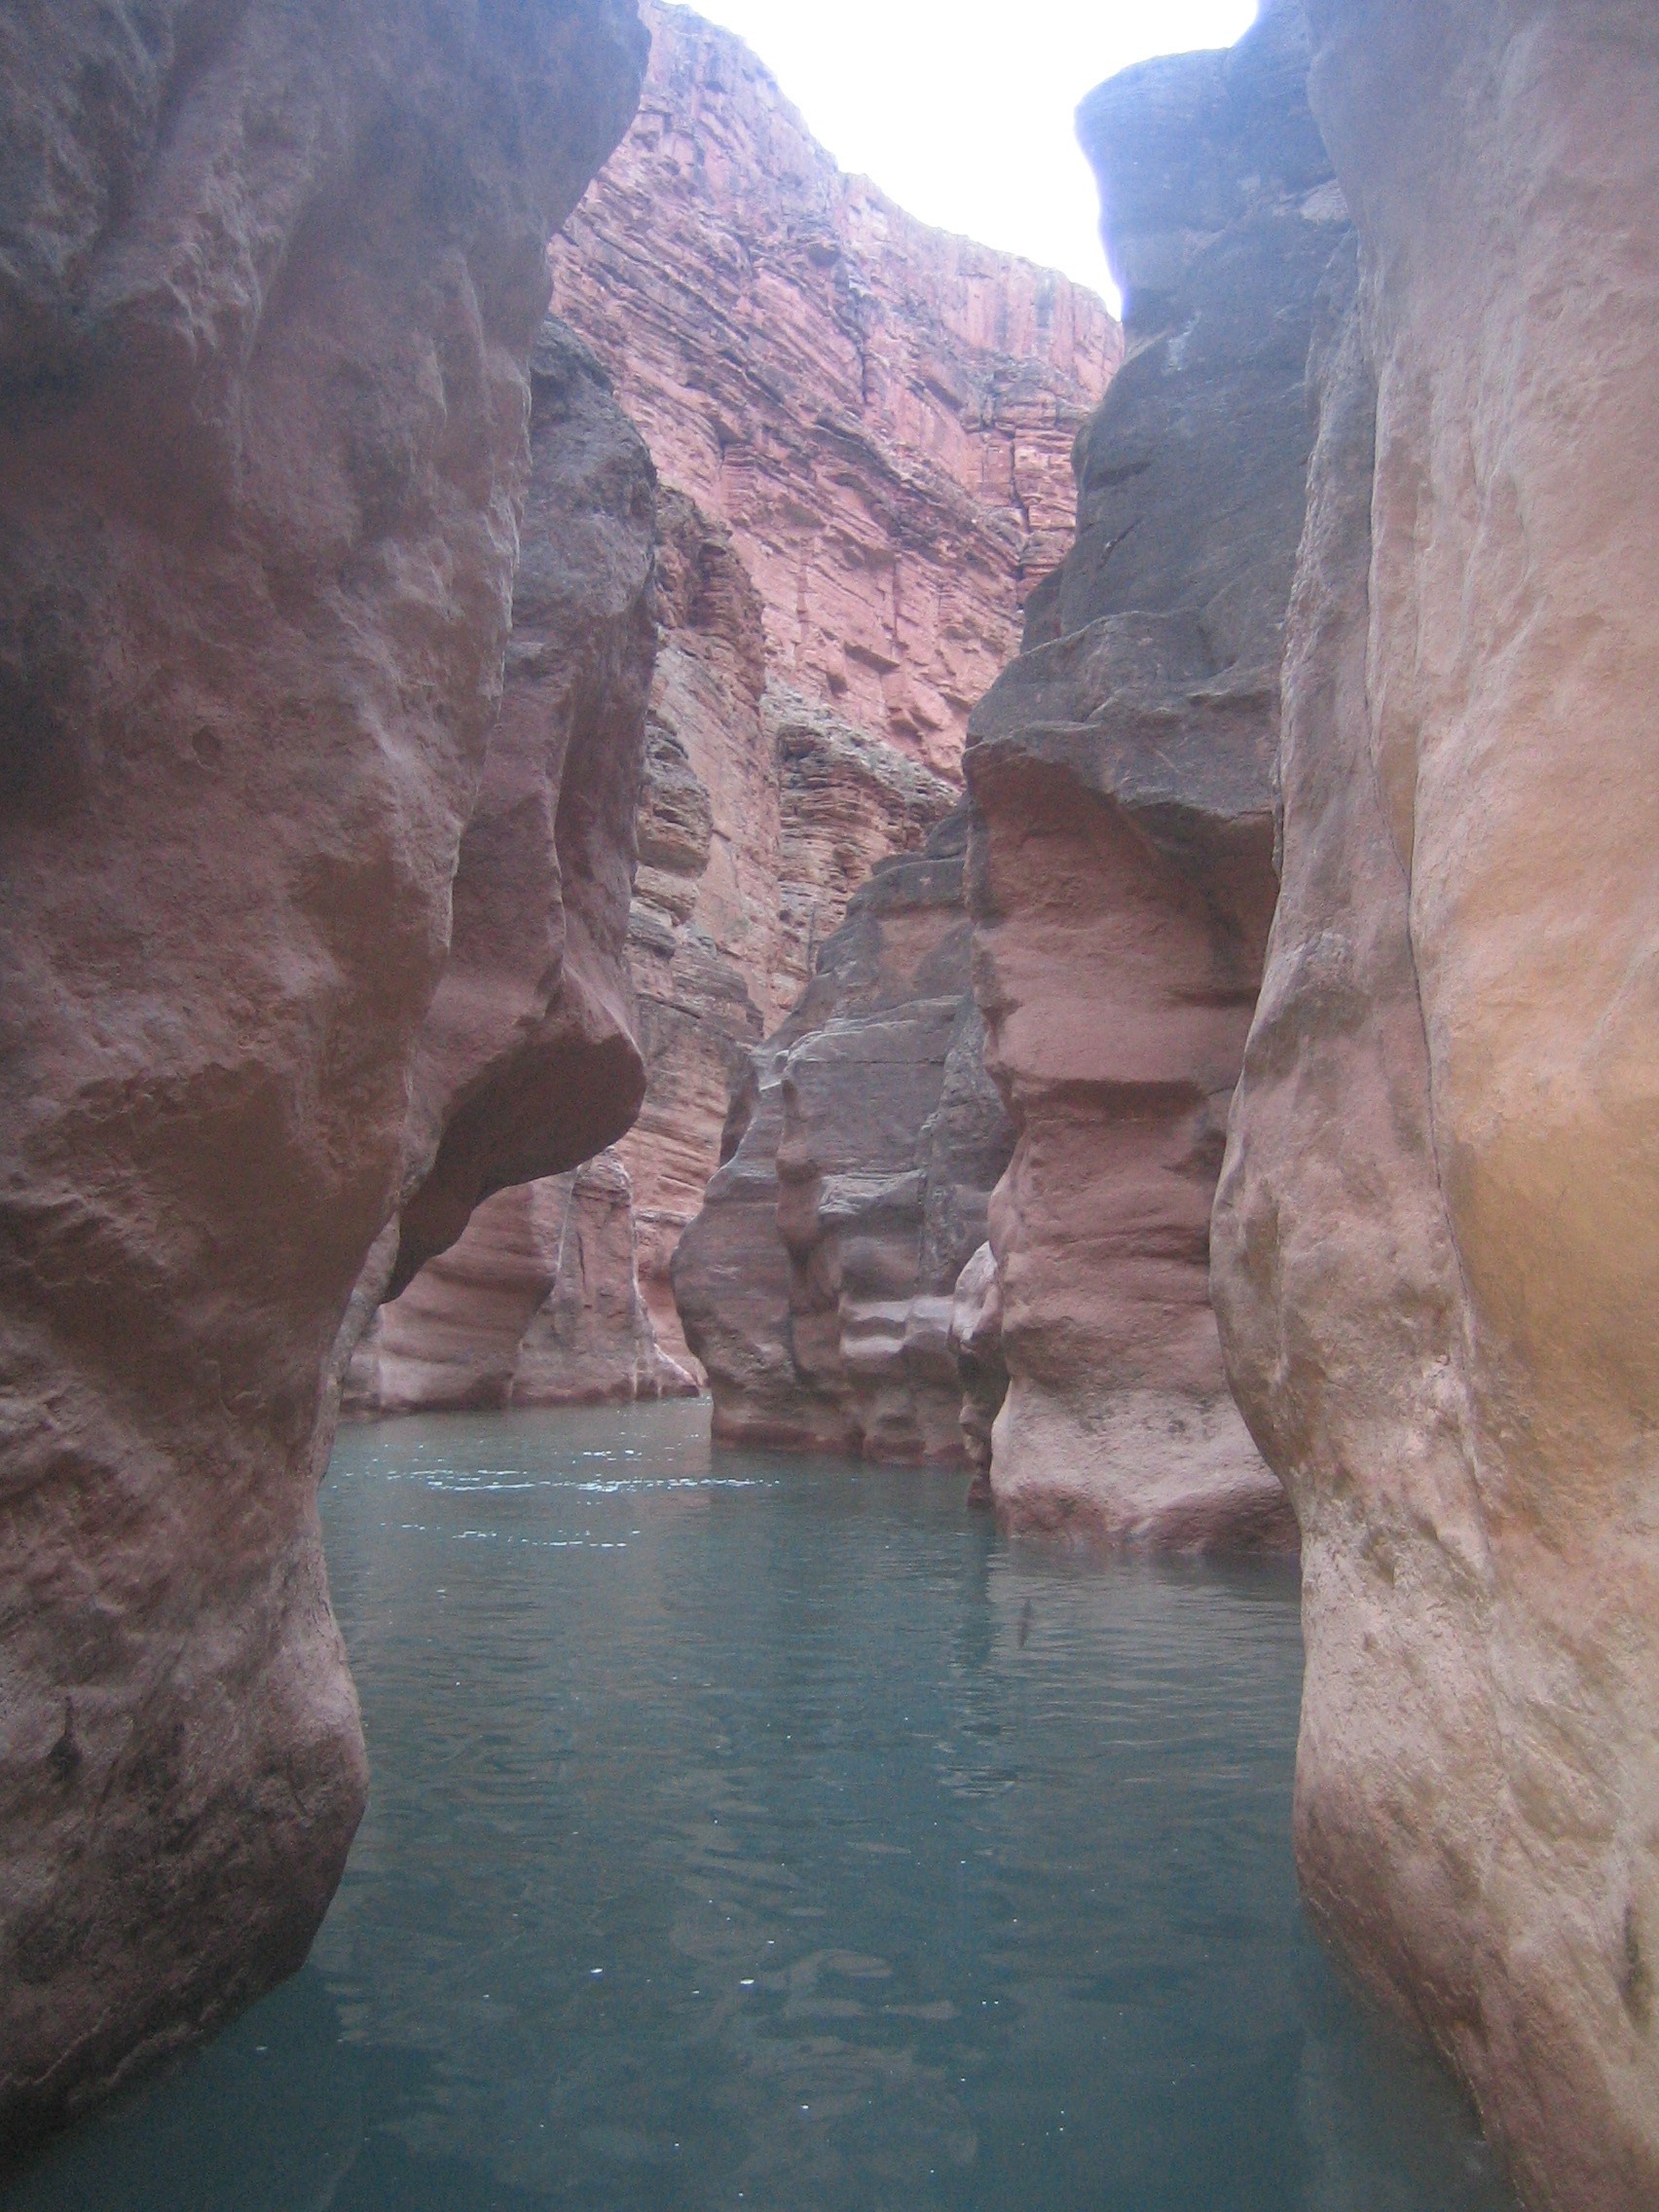
with Linda at the helm.  In the Red Wall Cavern, the musical instruments saw their second appearance.  Pictures do not do the cavern justice – it is an enormous amphitheater carved out by high river flows.  A must stop for lunch.  I completed my first successful “high side” maneuver today – where you avoid flipping a raft in rapids by throwing all our weight up against the high side of the boat.  We finished off the day with Mike’s delicious halibut.
  • Day hike: Red Wall Cavern – Located along river mile 33, Redwall Cavern is a ginormous ampitheater carved by high river flows into the Canyon’s limestone walls. From afar, the cave looks deceptively small, especially compared to the towering cliff above it. It’s not until you get out of the raft and start walking into the gaping expanse, and keep walking and walking, that you realize just how impressive it is. John Wesley Powell estimated that it could hold upwards of 50,000 people. Modern estimates are considerably smaller, but this sandy cavern is still large enough to play an epic game of baseball or frisbee.

IMGP1038_edited-1

Day 4: “Commencement of the Water Wars” Nankoweap Ruins (~mile 40-53)

  • The river version of the Wild Wild West was born with the attack on Chris.  The plot and perfect execution of the attack by assailants, Jess and Erin, wrecked havoc on the Coyote Crew of 16.  Chris was standing on his raft, gazing off into the canyon walls (typical), when Jess strategically asked if there was a rapid approaching…both parties knowing full-well that there were no rapids for miles.  All the same, Chis stood puzzled, and turned his head for a split second.  In that second, a bucket of icy chocolate water soaked him from head to toe.  Erin, grinning devilishly, clenched the empty bucket…and two significant events occurred simultaneously: the beginning of the 1,000 year was and the nickname “Precious”.  This day also marked the beginning of our bocce ball obsession.  With a crew of adventure junkies and engineers, a new game was fashioned “Extreme Bocce” (names for it’s difficult, rock-laden courses).  Soon to follow – “Night Bocce”, with the reigning champions “Dos Beeches”.  For a sentimental reminder, the stars.  The stars. The stars.  Just wow, I have never seen a night sky the rivals the beauty of endless stars, shooting stars, planets, constellations and satellites.  So vividly cool.
  • Day hike: Nankoweap Ruins – super awesome Indian ruins carved into the side of the cliffs.  Incredible history lesson, and the views of the Colorado river from this spot are stunning.

Grand Canyon Trash Tours 2006 054

Day 5: ” This is one big ditch!” miles 53-71

  • Nurse Mol (my mother) went overboard in Tanner!  Thus, the cocktail clinic opened a little late this day.  Mom and Brian were thrown overboard on a monster wave in the middle of the rapid.  They were washed a ways downstream, only to be rescued by Woody in the ducky (kayak) in knee deep water.  Alliances began to form in the water wars.  All teams were suicide diving…going for legs, empty buckets, wristwatches…whatever they could get their hands on.  Julie’s ruthless commitment to the war gained her the title “Zena, the Warrior Princess”.  The name stuck until we realized another Backbuster had already claimed that name, so Julie’s was promptly changed to “Athena, Goddess of Justice”.  That woman knows revenge.  Dick coins the phrase “This is one big ditch!”, referring to the Canyon.

Day 6: “Poisidon’s Revenge” miles 71-87, including Hance Rapid

  • The oarsmen had their first scouting session just before the Hance Rapid (9/10 on the rapid scale) to determine how we should approach and tackle the beast.  Every oarsman had a specific method of attack.  Chuck always managed the courage to go first and be the “probe”.  Chris needed his angels down in the bow. Grand Canyon Trash Tours 2006 144 
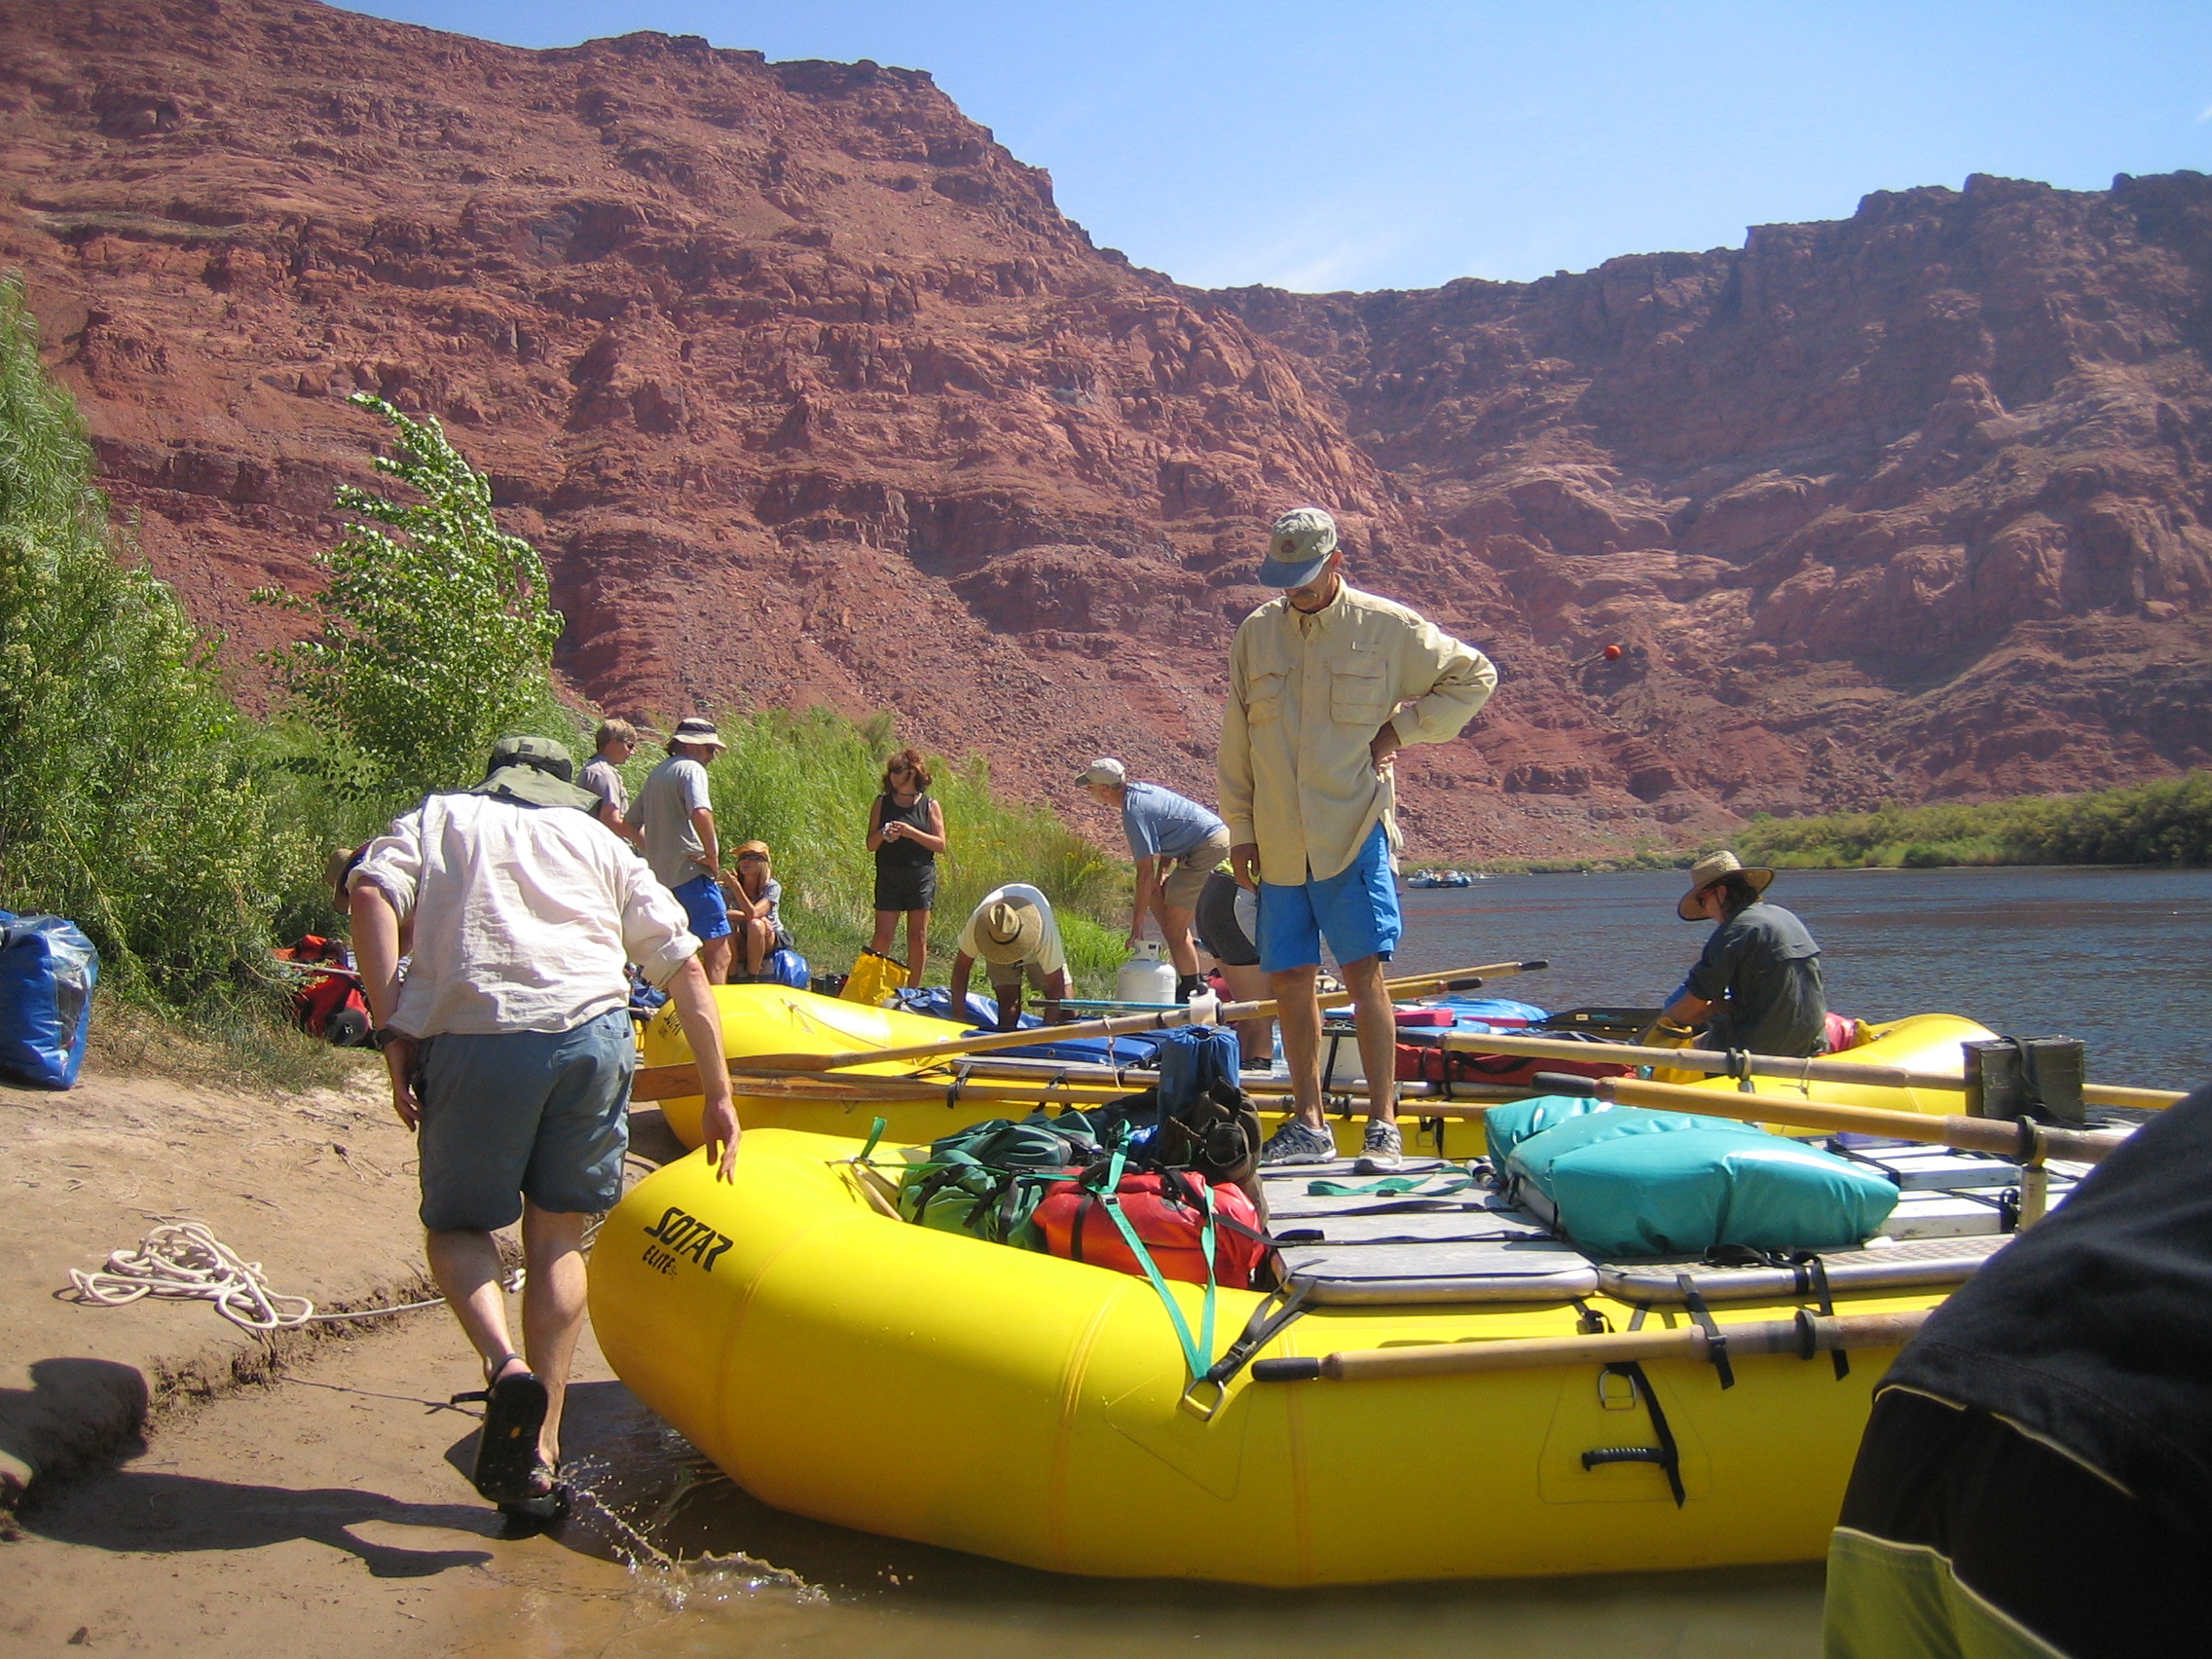
John needed absolute silence on his boat.  Coyote has a calm that manages to make one forget that they were in a smaller boat with a leak on the bottom.  Jess threw on his lucky bandana and smiled reassuringly.  Christine turned, non-chalantly, towards the dukcy and got ready to take Hance head-on.  Needless to say though, I think everyone was a little nervous despite appearances.
  • The aftermath: Jess, Matt and Erin were thrown out, Coyote was washed overboard, and Christine swam nearly all of the monster.  Jess somehow managed to hoist himself back into his own boat, row out of the rapid and rescue Matt…all in a matter of about 20 seconds.  Wendy, Julie and Chris graciously saved me and agreed to a temporary truce in the water war.  Christine was ultimately rescued as well, after a few unsympathetic encounters with boulders in the rapid.  I was pretty shaken up afterwards, and gagging on water for a while after.
  • Day hike: Clearwater Creek – on of the canyon’s best kept secrets.  We had the whole place to ourselves!  Great waterfall at the end.

Grand Canyon Trash Tours 2006 059

**Reflections on the first half of the trip**

The biggest challenge of the first half (before Phantom Ranch) was getting to know everyone in the group and discovering each other’s comfort zones.  We spent a lot of time rowing the flat water, with little current, and learning how to prepare the meals and pack/unpack our bags.  A lot of work to do, little day light to work with (9pm being absolute bedtime) and I obviously cannot ignore the fact that whenever there was a lull in the conversation, “Groover chat” came up (the Groover is our portable toilet).  The women wanted to Groover set up in hidden forested areas, emphasizing privacy.  The men, on the other hand, preferred the edges of vistas, with great views…great views for the groover and great views from camp of the groover.  Not my thing.

Day 7: “Pumpkin and his Seeds” Phantom Ranch, mile 87-96.5

  • We said good-bye to some of our esteemed friends, including Linda, Jess, and Woody.  We were introduced to our new comrades, Tom, Jim and Willy.  Chris, donning all orange clothing, became known as the “Pumpkin” (he preferred “Great Jack-o-Lantern”, for a more masculine title).
  • Day hike: Phantom Ranch – the midpoint of the rafting trip and the only place where members of the group can hike in/out.  There was also a payphone where we could make calls to our loved ones.  

Grand Canyon Trash Tours 2006 072

Day 8: “Day of the Gems” Crystal Rapid, miles 96.5-112

  • The rapids, named for precious gems, were fairly big in this stretch.  The crew scouted Crystal and all managed to find the line perfectly to avoid the big holes.  Excellent run by all oarsmen.  Chris’ boat, amidst the celebration, managed to find its way to another rock in the lower Crystal Rapids.  HIGH-SIDE!  Good thing he had the angels working for him.  Julie was also nominated for having the most adorable shiver in the group.

Day 9: “Longest Day Ever” Elves Chasm, miles 112-133.5

  • Covered a ton of ground today.  Grasshoppers have found their way onto our rafts.  ThIMGP1108is marked the day when Brian ran Bedrock and won the understatement of the year award “Yabba Dabba Do!”.  With a nonchalant, but somber, high-side instruction, Matt, Brian, Tom and Willy pin-balled down the water road less traveled.
  • Day hike: Elves Chasm– very cool hike where the oldest rock in the Canyon can be found (~1.8 billion years old!).  John was the first ambitious one to jump into the chilly pool beneath the falls and make his way up the cave to jump off the top.  

Day 10: “Mama and her Sherpas” Tapeats Creek

  • Note to self: a hike with the Coyote is never just a simple stroll down Main Street.
  • Day hike: Thunder River– this hike is absolutely stunning.  Cascading falls, water plunging out of every Canyon wall, vegetation so lush that you find it difficult to believe that you are in the middle of the desert. The picturesque landscape reminded me of a postcard.  The hike back to camp proved a little more difficult.  Molly was shimmied across the teeny excuse for a trail, hugging the side of the mountain.  Matt was in the front and Brian was bringing up the rear…that’s a family that knows the value of teamwork.  With the wind blowing wildly, the gravel trail narrowing, and the cacti calmly waiting at every bend for another innocent victim to embrace them…the group finally made it to the end.  The end of the trail, that is. We had gone the wrong way back!  Ultimately, we decided to free climb down the vertical face, with some scary exposure.  Not excellent for those with a fear of heights.  Luckily, with the help of some experienced climbers in the group, everyone got down safely and my mother was re-nicknamed “Mountain Goat Molly”.

IMGP1127 Grand Canyon Trash Tours 2006 134

Day 11: “Tent Caroling and Food Fights” Deer Creek & Pancho Camp

  • This evening, at the request of the “Old-Wise One”, Chris nominated himself as the “Sacrificial Pole” for the pole dancing competitions.  John took the heavyweight title for the foot war championship, Grand Canyon Trash Tours 2006 148beating out our exquisite chef, Mike.  The tent caroling began with earnest.  Caroler’s at Jim’s tent saw two full moons that night.  We learned the true meaning of “hit ’em straight” and finding a “tight spot” on the river.
  • Day hike: Deer Creek – a neat day hike along the Thunder River with Hopi Indian hand prints embedded into the Canyon walls and small, warm-watered pools at the top.  The pools, with small waterfalls cascading into them, provided a nice shower amidst a hot, sweaty hike.

Day 12: “Upset at Matkat” Matkatamiba

  • We successfully ran Upset rapid later in the day (a 7 on the rating scale with current water levels)

Grand Canyon Trash Tours 2006 113

  • Day hike: Matkatamiba – hiking through the caverns of Matkat.  The pristine cavern, carver out by an ever meandering stream, was astounding simply based on its structure and color schemes.  Thin cavern walls in a symmetrical pattern of ghostly white, grey and blackish stripes accented by the water flowing through.  

Grand Canyon Trash Tours 2006 157 Grand Canyon Trash Tours 2006 165

Day 13: “Eco-Quest: Are These Guys from New York City?” Havasu Canyon & camp at National Canyon

  • Layover day, due to the extended day hike.
  • Day hike: Havasu Canyon Hike – this was my absolutely favorite hike of the whole trip.  Known as the Garden of Eden in the desert, Havasu Falls is one of the most well-known waterfalls in the world. Located on the Havasupai Indian Reservation, the beautiful turquoise pools and spectacular waterfalls are breathtaking.  Wendy, Chris, Matt, Tom, Christine and myself embarked on a 4-hour hike through river crossings, over rock ledges, past the famous and lush Beaver Falls, and into the Havasupai Tribal Lands.  We were walking so fast to make it to Mooney Falls, we were likened to an NYC city pace.  Mooney Falls was astounding – huge turquoise falls billowing over the edge of the Canyon about 50 yards up.  The Falls cascade down into a pool of water only ankle deep.  Large, droopy trees grow from under the water and provide ample opportunity for rope swings over the smaller, descending waterfalls at the base of Mooney.  Truly a magical place.  

Grand Canyon Trash Tours 2006 170 Grand Canyon Trash Tours 2006 179 Grand Canyon Trash Tours 2006 182 Grand Canyon Trash Tours 2006 195

Day 14: “Eco-Quest: Part II?” National Canyon

  • Perfect layover campsite.  Chris, John, Wendy and Willy set up a ropes system to get our group up the Canyon wall and into some spots unknown to our veterans.  This evening marked the All-Team Bocce Grand Canyon Trash Tours 2006 198
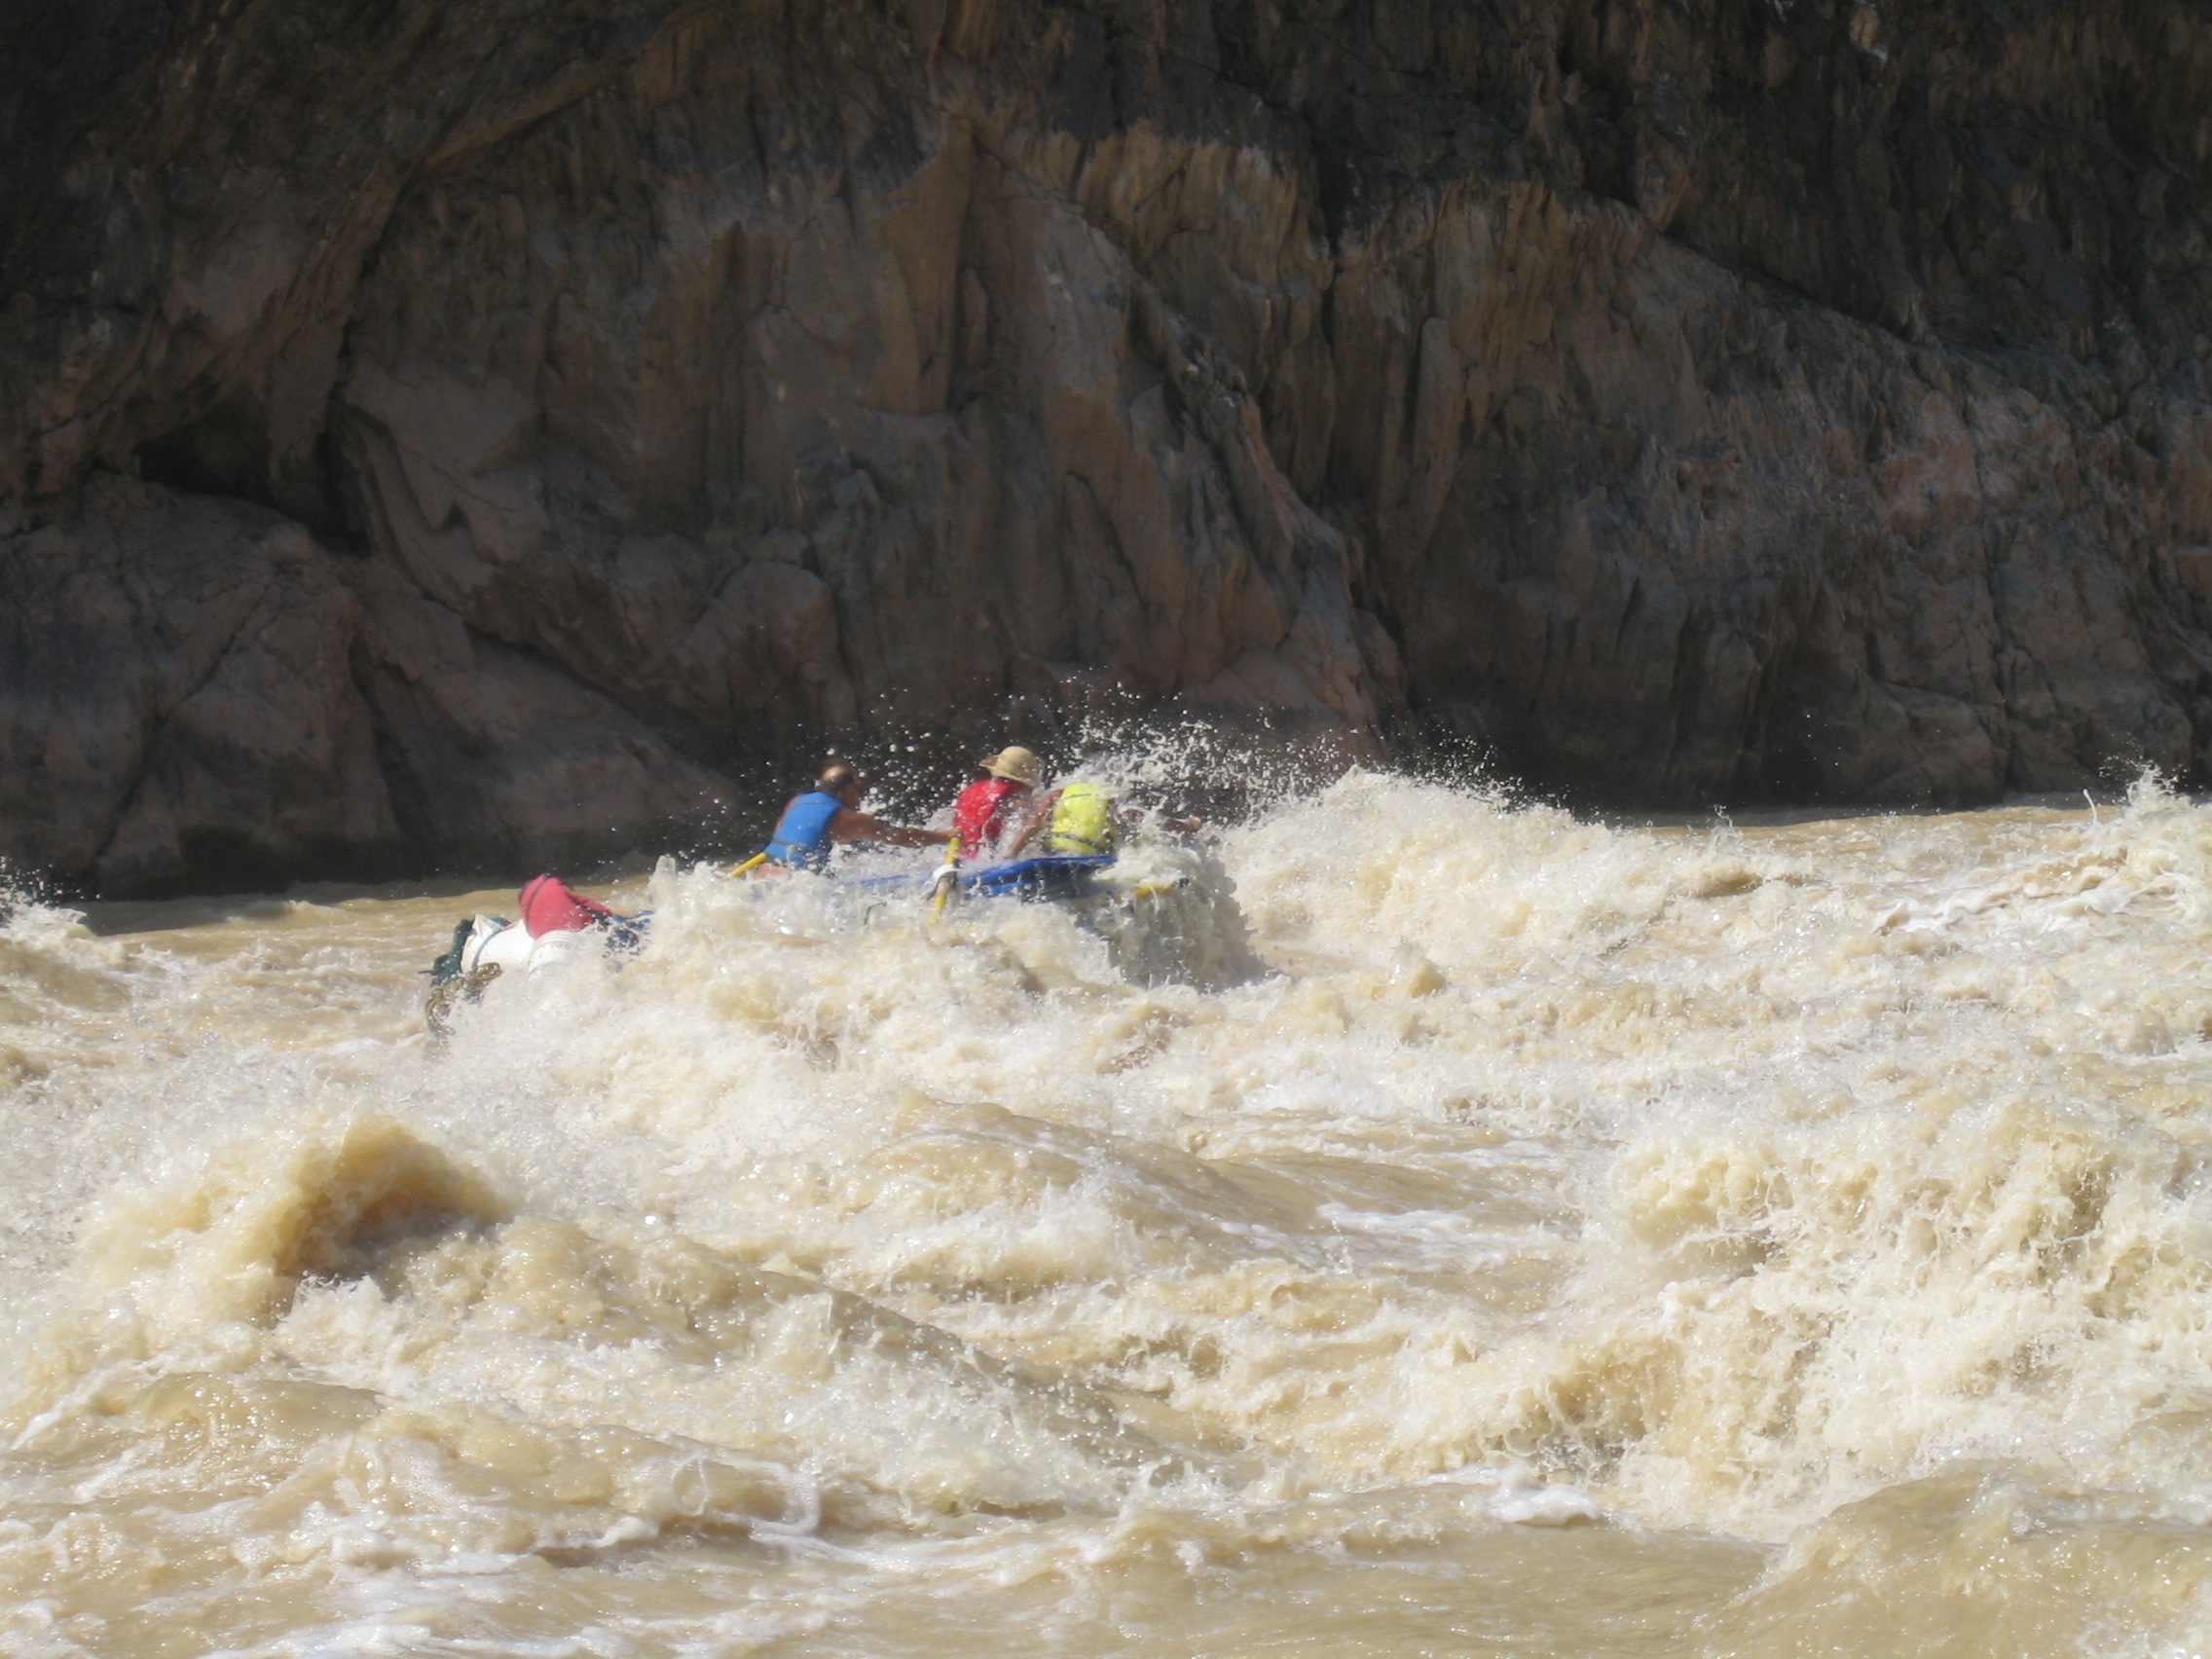
Tournament.  The teams included Scorpions, Sacrificial Poles, The Hobbits, Wet Willies, Bleached Bums, Dos Beeches, Big Kahoneys, and the Trash Tours.  The night’s festivities were made up of limbo competitions, Lava Falls shots in honor of the River Gods, tent caroling, Dick’s trumpet playing TAPS, wheelbarrow races, lap dances performed by men…and so it was, the “15-year laugh” resonated throughout camp.

Day 15: “SPAM & Not-so-smart Bombs” Lava Rapid

  • Lava Rapid has been on our minds since we started the trip.  This scary, mega-sized rapid is a challenge for all who embark on a Colorado River trip.  In our case, success.  The oarsmen all found the bubble line, missed the Greyhound bus hole and dodged the meat grinder…need I say more?? The celebrations to follow were unprecedented.  Everyone had been storing a costume in the very bottom of their river bags for this moment alone.  We saw everything from an obviously chilly “Julie” to an actual “Piece of Crap”.  Chuck might have been surprised an albino toothless beaver didn’t make it to the party…or did it?  About 5 Budweiser/Bailey’s/Early Times Bourbon shots later.. the tent carolers were on a mission for Chuck.  The chants and animal grunts could be heard all over camp.  Chuck even stuffed a sleeping bag to try and dupe the poor, drunk tent carolers.  Gas was set alight, Dr. Evil disciples emerged in the kitchen, “Build Me Up Buttercup” became a theme song, and the Hammus Alabamus still lingered in the pot.

Grand Canyon Trash Tours 2006 209

Day 16: “Tenacious Tadpoles” mile 191-205

  • The group all wore t-shirts and skivvies to breakfast in honor of their beloved trip leader.  Apparently, one big night can put an entire crew to bed by 8pm.
  • Day hike: Spring Canyon – not a very exciting hike. Minimal water surrounding the algae-laden creek filled with tadpoles and mini frogs.

Day 17: “I don’t see anyone here who is above the rim” camped at upper 200, Pumpkin Springs

  • Last full day and I cannot believe how far we have all come.  Tom’s boat officially became the party boat of the trip, manned by Dick, Willy, Jim and Tom.  The were armed with water guns and a full drag-bag of Budweiser.  Grand Canyon Trash Tours 2006 252The 1,000 year war saw a peace treaty after Chuck pulled out the secret weapon, and the water equivalent of an Atomic Bomb: the pee-bucket.  The Hobbits won the Bocce Tournament.  The theme of the trip became “Go Big, or Go Home”.
  • Day hike: Pumpkin Springs – cool little pool on the edge of the river but only the Coyote braved the arsenic waters.

Day 18: “Feeling Sedimental” Diamond Creek Take-out

  • Brian’s wit inspired today’s title.  Back to civilization.  Extremely sad saying goodbye to our new, but lifelong friends.  LAST CALL FOR THE GROOVER!  An epic adventure that will stay in my memory for a lifetime.